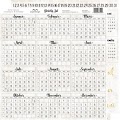
Here, I have created a small calendar with the new Christmas collection from Papirdesign.
The calendar has been created with thick cardboard. The cardboard has been cut in four pieces. Two larger ones to create the front and the back of the calendar, and two smaller ones used under the calendar. The cardboard pieces have been glued together with thick duck tape. The cardboard base has been covered with white paper. Then panels with Papirdesign paper, has been added.
The calendar pages has been added in layers. The months are cut out from a Papirdesign paper. I have added layers with silver and white cardstock to the back of the calendar pages. I have added holes to the calendar pages with a punch. The book binder rings are going through the base of cardstock, and bind the calendar pages together.
The calendar has been decorated simply inside. I always decorate my alter projects/ beyond the page items - on all the sides, including inside. I think this is important to give it a finished look.
The ccalendar has been simply decorated at the back, with a personal stamp and a butterfly.
On the side of the calendar, I have decorated it - mixed media style. I have used my own stencils, distress ink, and thick Opal Magic paint (One of the disadvantages of giving classes is that the paint does get thick as the lids are not always put perfectly back on. No worries - this is perfect for using with stencils). The flowers are from Petaloo. The heart is from Rayher.
Materials used:
 |  |  |  |
 |  |  |  |


Kjempefin, vet du hvor jeg kan finne mal til den?
SvarSlettFramgangsmåten er beskrevet i teksten over. Målene på pappen er ikke oppgitt, men det måler du utifra kalenderen du skal bruke.
Slett