lørdag 25. februar 2017

A Mixed Media Trowel with Patina effect

I have worked with patina and rust for some time. A lot of artist has done paint brushes and spoons, so I decided to do something else, a trowel. 


I have used a mixture of bits and bobs from different brands, Prima molds, Wild Orchid roses, Kaisercraft gear dies, beads and Tim Holtz quotes. 
 

Paints are also from different brands.


This is a mixed media class that will be given in Northern Norway in April. The information about the class is given below in Norwegian.

____________________


Mixed media kurs


Tidspunkt: 

21-23 april 2017 på Papirdukkenes treff i Kjøpsvik. Kurset varer ca 3 timer.


Pris: 

Kurset koster 450kr og inkluderer materialpakke, 
samt endel fellesutstyr som du får låne på kurset. 


Send mail eller pm om du vil melde deg på kurset.


Dette må du ha med på kurset:

Saks
Limpistol med lim
Pensel til tørrmaling (ca 1cm bred)
Heat gun / Varmluftspistol / Embossingpistol

____________________________


fredag 24. februar 2017

Inspiring waves

I have altered an old IKEA frame, and used it for a simple mixed media project.

We all go through hard times every now and then, and I found this wave quote from Kaisercraft's new Island Escape collection inspiring.  "Waves are inspiring, not because they rise and fall. But because each time they fall, they never fail to raise again." I wanted to create something to hang on the wall from this quote.


The background is white cardstock. I have used stencils ogether with gesso, ink and mists on the background.


The frame, is an old IKEA frame. 


At the bottom of the frame, I have used shells and a lighthouse from one of Kaisercraft's boxes of wooden embellishments.


The image, chessecloth and flowers has been added in layers.


Kaisercraft Products: P2247 Ohana | PP1014 Paper Pad | IT003 Waven | DD422 Texture Netting | IT004 Bubbly | KM105 Turquoise Kaiser Mist | IP727 Lagoon Ink Pad | IP726 Island Ink Pad | CD101 Coconut Weave Cardstock | RS402 Rhinestone Island Lagoon.

torsdag 23. februar 2017

Easter ornament with a hot air balloon

Acrylic ornaments are not just for Christmas. This has been created, using one of Hobbykunsts ornaments. Here, it has been decorated with easter colours. 


The tiny easter eggs are old, but Hobbykunst has got several easter eggs in the shop for decorations like this. 


Flowers are from Mathia and Petaloo.


The ornament can be devided into two halves, with a large opening in the front.


The hot air ballon has been built after this template. You can find the tutorial on how to build the hot air ballon in the video below. 


Materials used:


 Delbare kuler m/åpning, str 12 cm  Authentique: Felicity Two - Felicity  Maja Design: Flirty - Summer Crush  Maja Design: Long summer nights - Summer Crush 
 Mathia: Roser m/stilk, 15mm - Hvit  
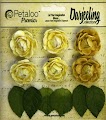
Petaloo: Yellow - Darjeeling Garden Mini Rosette 
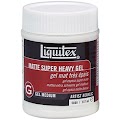
Liquitex: Super Heavy Matte
LX5808
Liquitex: Super Heavy Matte Scor-Pal: Scor-Tape 1/4 inch


onsdag 22. februar 2017

Time for a Cuppa, with LDRS creative

Today, I am showing you antother card with the wonderful sweet mice from the Candi Bean collection for LDRS creative. The stamp is called "time for a Cuppa". The image has been coloured with distress ink on water colour paper.

The die set used for this card is the Fancy Rectangels Layers Die set. These dies has also been used inside the card, to create space to write a message.

To create the embossed pattern on the inside of the card, I used the Picnic Quilt Embossing Folders.

Materials used:

LDRS: Fancy Rectangles & Layers Die Set Little Darlings: Picnic Quilt Embossing Folders Kaisercraft: Sea Breeze Paper Pack


Happy crafting

søndag 19. februar 2017

The Little things, layout shown at CHA at Kaisercraft's stand - Spring 2017

I had eight layouts on show at Kaisercraft's stand at CHA this spring. The first one I am going to show here, is this layout created with the Hanami Garden collection.


The photo was taken at temple in Kyoto, when I was i Japan two years ago.

The flowers under the photo is part of the background paper and has been fussy cut from papers from the collection


_______________________________________


INSTRUCTIONS/ TUTORIAL:


PAPERS: Hanami garden Paper Collection – P2254 Sakura, P2258 Hoshi.

KC PRODUCTS: PP1015 Hanami garden Paper Pad, CT875  Hanami garden Collectables, F640 Paper Blooms - Fairy Floss, Mini Paper Blooms - F646 Buttercream. F657 Fairy Floss, F667 Coral, FL590 Flourish Pack – Love, DD129 Decorative Die - Words The Little Things.


Photo: 8,5cm x 10,5 cm (3 3/8” x 4 1/8”) (Temple in Kyoto)

Cut 10 cm of the bottom of the HOSI paper (The tree is on the top part of the paper). Glue the HOSI paper onto the SAKURA paper, leaving the flowers on the SAKURA paper at the top of the page. 

Curl the top right side of the page around a knitting needle. Glue a page from the small HANAMI GARDEN paper pack at the back (reverse). Curl this little paper in the same way. The right side of the paper will show as you curle it. Glue a new page at the back of the corner (right side). 

Cut a rectangle 14cm x 11cm (5 ½ “x 4 5/16”) from one of the papers in the small paper pad. Add the paper to the top right side of the page (use 3D tape or cardboard between the layers to create dimensions). Add the photo to this layer. Add flowers in-between the layers.

Cut out the text, using dies, and add it to the page.

________________________________


 Hanami garden layouts at CHA - spring 2017. Photo: Luciana Warnowski

tirsdag 14. februar 2017

Planner inspiration

On Sunday, I had an article published in The papercrafting about planners. This article is more of an introduction to planners, and different from this blogpost. 

I am probably not the most active "planner girl", but I do like my planner. For me, it's a way to keep organised with work, deadlines, DT posts, and keep track of some of the creative ideas I get along the way. I have a Carpe Diem, that I got last year. I only have one planner, but like to have everything in one place. The planner is rather large, and yes, I did have to get a new hand bag that was large enough for the planner. 


Last year, I had a large pencil case, that I brought with me, together with the planner. It kind of got to me, because it was to much to carry around. Therefore I made a pencil case, that would fit inside the planner, and could be put in the ring binder. As a quilter (and this might be a bit embarrassing), there was not a problem to find materials in the same colour and pattern as the planner, in my little collection of materials.....  The pencil case is large enough for a few markers, pencils and a pair of scissors.


This year I have also adventures into "Sticker World" and created my own stickers. They have been created using a Silhouette (Print and Cut). To test it out, I started with some freebies found online from Vintage glam studio. You can also find a list over sites that offers planner freebies at Amberdowns. There is often restrictions to freebies like this. They are often only for personal use. If you use them, and show them online, please link back to the actual site where you found them (not Pinterest or Google). I also used some free Silhouette cutting files, to create stickers from them. In the end, I ventured out in the world of designing my own stickers.


This year I also added a plastic pocket with a zip to the planner, for storage. I have also added some plastic pocket pages to the planner. These has been created with a fuse tool. 


This year, I had a different calendar in my planner. There was no monthly dividers. I created my own monthly dividers with the silhouette. The idea is to create some layout pages on these monthly dividers with some photos and quotes. 


One of the pages is this simple page. The text is a Norwegian quote "It's to late to blow your nose, when your nose has gone". 


Here is a Tim Holtz inspired page. The stencil is from Tim Holtz. Rust paint from Finnabair. The photo, is one I took at CHA last year.


The two last pages are full with post it notes and a note pad. I use the note pads rather a lot. This makes it easier to colourcode the different tasks and DT jobs.

mandag 13. februar 2017

Shaker card Bonanza - How to create shaker cards

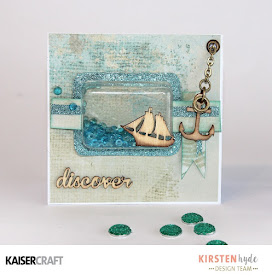
I am often giving classes, and get asked about how to create shaker cards. I decided to go through the process of creating some different shaker cards.  These nine 4" x 4" shaker cards, are created from one sheet of patterned paper. I used glass beads, half beads, sequins and micro beads inside the shaker boxes. The shaker boxes has been made from packaging or hand made with dies, acetate, paper and 3d foam. 


I have used micro beads, beads, sand, sequins and half beads inside the cards. In the video below, I am going through the different ways of creating these shaker cards. 


Individual cards shaker cards:

Cards with shaker boxes made from packaging:


Card created with a hand made shaker box, from a frame from the collectables:


Cards with hand made shaker boxes, created with dies:


Cards with a shaker box with a pattern:


Cards with several shaker boxes:

These shaker cards are great, where you want different colour beads or sequins inside different parts of the card. To create these cards, you create several shaker boxes behind the front cardstock.


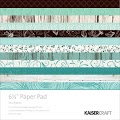
Kaisercraft Products: Island Escape: P2244 Maholo | CT874 Collectables | FL594 Life's a Beach Flourish Pack | DD948 Tropical Beach Die and Stamp set | SS331 Sticker Sheet | DD747 Decorative Die summer Words | DD924 Decorative Die and Stamp Tailor made | DD914 Decorative Die and Stamp Cute Tags | FL574 Costal Escape Collection Flourish Pack Sea Life | FL591 Flourish Pack Nautical | GC111 Glitter Carstock Frost | IP724 Ink Pad Bark | IP723 Ink Pad Vintage | IP719 Ink Pad Black | IP731 Ink Pad Berry. 

Other: Acetate, micro beads, beads, sand, sequins and half beads