This year, I have been writing articles for the magazine Ett trykk. In the June magazine, I did a tutorial for a lantern. The summer has been hectic for me, with moving and changing job. Crafting and bloging has been on hold. This is one of the blogposts that has been on hold for a while.
The lantern has been made with papers from Kaisercraft that makes it look like a real lantern.
Ett trykk's June edition.
The lantern has been made in two seperate pieces. A base and the lantern. I have used a small glass inside the lantern, with an electric tea light. Don't use a proper tea light inside this lantern.
Creating the lantern:
Cut the pieces from the template. You need four pieces. Choose eighter the lantern in one colour or create the roof of the lantern in a different colour (middle template). Glue the two pieces together and follow the instructions bellow. You also need four frames for the windows.
The four pieces cut out from the template. Score along the stiched lines.
Fold along the scored lines.
Glue two and two pieces together at the base. Wait with gluing the roof.
Glue the base pieces together. Wait with the roof.
Add a piece of cardboard to the top of the lantern. This is to create stability.
Add glue or good quality dubble sided sticy tape to the tags at the side of the four roof pieces.
Glue the roof pieces together at the sides. Glue the four pices over each other at the top. This is creating a flat top to the lamp.
Add another piece of cardboard to the top of the lamp.
Use a styrofoam or paper egg and a book ring.
Put the book ring through the egg, and close it.
Cut of the bottom part of the egg.
Glue the egg to the top of the lantern. For decoration, this top was painted with rust paste at the end.
Four window frame pieces were cut. I added acetate to the outside of the windows.
Then the windows were glued to the inside of the lantern.
Lantern base:
Cut out the base according to the template.
Score along the dotted lines.
Fold along the scored lines.
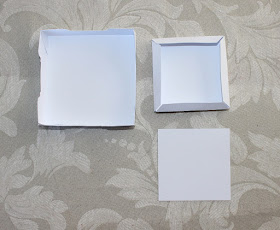
Glue together the base at the left. Glue the base at the right, and glue the square to the bottom of the base at the right.
You end up with two pieces.
Glue the small part of the base to the middle of the larger base.
Add a piece of cardboard to the base for stability.
Also add some pieces of cardboard to the inside of the feet for stability.
Finished lantern
Now, you have finished the basic lantern. Decorate as you wish.


You are so clever, Kirsten. Always amazed at the things you come up with. <3
SvarSlettHi. I really appreciate this activity. Could you share the template to download.
SvarSlett