It is a fantastic feeling to be able to create something nice for a special celebration. This airplane has been decorated for a wedding, but can also be decorated for child or other occations.
I have used the super sweet papers with golden foil from Anna Griffin - Ivory Gold - Charlotte Foil Cardstock. This collection is super for all those wedding projects.
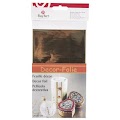
Golden foil is from Søstrene Grene. and the "congratulation text" is a die from Papirdesign.
All the flowers here are Mathia flowers. Sweet, simple and inexpensive from Hobbykunst.
Template
Tutorial
Cut out the wings. There is two sets of wings, and you need double layers of paper to create stability. AIt is also nice to have patterend paper on both sides of the wings. Also cut out the airplane body, tail (also double for stability and to have patterend paper on all sides). THe front circle has been created in white cardstock on this plane.
Glue along the fold - shown with double sided tape here. Use good double sided tape or good glue. I like to use Score tape or Uhu glue. GLue together so the body of the plane looks like the photo below.
Fold down the tags at the front and glue the circular front to the plane.
I also created strips and circles of golden foil for decoration along the front of the plane, and along the cockpit. I have not added templates for these. If you would like them, measure the circles on the plane/ template to create them. These has no other function than decoration.
Golden circles and strips added to the plane.
Support between the wings. Glue two and two together. This is for extra support and to have patterned paper on both sides.
Glue two and two wings together for extra support and to have patterned paper on both sides.
Mount the wings on the plane. The wing with the half cicle to the top of the plane. Mount the support between the wings, between the wings.
Mount two and two tail pieces together. This is for extra support and to have patterned paper on both sides.
Glue the horizontal part of the tail, onto the vertical part of the tail. Cut strips in the tail part of the plane, so the tail can slot into the tail part of the plain. Add a bit of glue, to make sure the tail is not falling of.
Air plane with wings and tail.
Cut out two propellars. Glue them together, with patterned papter outwards on both sides. Mount the propellar with a brad. Use a nut or simething similar between the propellar and the plane. This helps the propellar to turn around.
THe plane is finished, and you can now mount the wheels.
Glue the support for the wheels together. I have added several white pieces to the support and glued them on i layers. This is because I wanted it to be stronger, and to be able to hold the weight of the plane.
Also glue the wheels together to get two thick wheels.
You end up with a good support and thick wheels.
The plane is finished and can be decorated.
Materials used:

|

|

|

|

|

|

|

|

|

|
|

|

|

|
 |
You can also see the wedding album I created with the same collection from Anna Griffin:
Other planes with the same template:
Planes inside a Christmas ornament. The planes are about 2cm long.
A baby box with a plane, created for Kaisercraft.


Great plane! Thanks for the template, too. I have a friend that will adore this plane. I cannot believe you made 2cm planes to put inside a Christmas ornament. WOW!
SvarSlettThis is BREATHTAKING!!! Love it!!! Thank you so much for sharing a tutorial and a template... Very kind!!! :o) I will surely use it. I will link to your blog when I do. Also, I'm your newest follower. You create amazing stuff. :o)
SvarSlett