onsdag 19. november 2014

Vintage Christmas sledge with presents

 It is only five weeks until Christmas. Today I am going to show you a project I have done for Hobbykunst. I have decorated a Christmas sledge and treated it to look like driftwood. I have also added some decorated presents.


It is quite easy to get wook to look like driftwood. Mix strong coffee and vinegar in a jar and add steel wool. Leave the mix over night, and treat the wood with the steel wool. Several layers will create a darker colour. After this, I have added a few decorated presents.


I have used papers from Prima and dies from Tim Holtz and Prima.


The "Pimped Car" present


The read is made with paper from Primas Cartographer series. The stripes in the middle of the road has been painted with Triton markers. The number 4 is from the series Numbers - Sunrise Sunset Mechanicals Metal - from Prima. The key and miniature car, are both diecuts made with dies from Tim Holtz. I have also created some miniature "Wunderbaum" from left over papers. These have been fixed to the key ring with small jump rings. The key ring itself has been made with a  Binding ring.


The small car was an old, used toycar. It was yellow and really boring. I pimped the car, using beads, and metal bits. The car was then painted with black Gesso. I then painted it with MetaMica, Verde Gris og Pale Gold. The flames are made with car polishing wool, coloured with distress ink:  - dried marigold, fired brick and mustard seed.


The vintage gear tag present


On this present, I have made a tag with Tim Holtz's gear tags. I have used cardboard to create the basic tag. I have used paper from Epiphany from prima to cover the large gear. The smallest gear has been coverd with glitterpaper in silver. I have also decorated with metal and ribbons and a rose.


The snowman present


The snowman is a dies from Tim Holtz. The paper is also from Epiphany from prima. The star buttons are from Finnabair. Flowers and dies are from Prima..


The French "présent"


The Eiffel tower is a dies from Tim Holtz. This paper is also from Epiphany from prima. The stars and the number are from Finnabair. The wooden star is from Rayher


tirsdag 18. november 2014

A stationary box with Pion

Today StampARTic is showing you creations with papers from Pion design


I created a Stationary box filled with cards and tags with my papers.


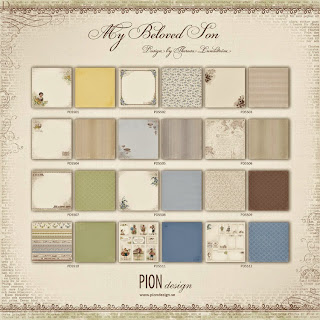
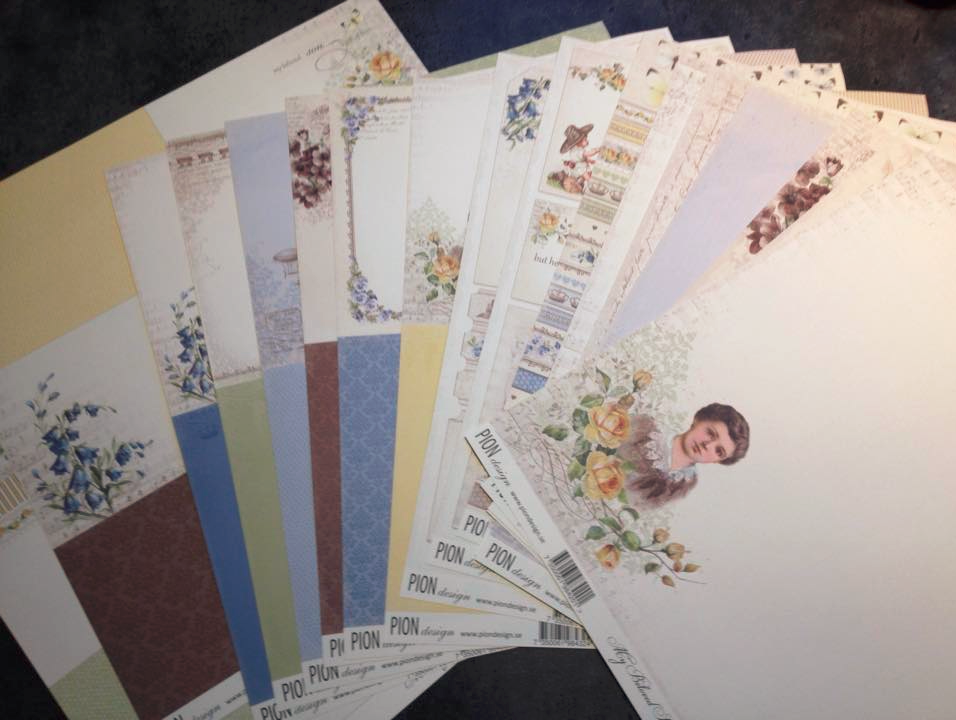
I fell so lucky to have got the entire collection of  My Beloved son, with 12x12 papers, 6x6 papers and memory notes - 21 sheets of gorgeous papers!


So I created a Stationary box. The tutorial is made by Henrikke in 2012 and can be found among . StampARTIcs old tutorials.


The stationary box opens and reveals the cards and the tags


The stationary box with the cards and tags. The papers are so nice, that I deiced not add to many embellishments and flowers to the box and cards.


Tags


Five simple tags, using the tags in the set of papers. I have added som Crinkle ribbon from Tim Holtz and colourd it with distress ink.


Miniature cards


The small cards are simple, using the memory notes. The heart is is cutting file from Birds Cards.  The stamp "Thank you for beeing the one you are" is from North Star Stamps. The stamp "De beste ønsker" is from Kreativ Hobby.


Napkin fold card


I have also made a Napkin fold card  after an old tutorial from 2010, made by Marianne Skjelstad. The edge of the card is a cutting file from Birds cards.


The card can be opened after taking of the band.


Revealing the message inside the card.


Card with swirls


This swirls in the base of the card is made with a cutting file from Bird cards. I have added blank acetate inside the card to stabilize it. I have added Pieces from the Pion paper ad half pearls.


The back of the card. There is space to write a message inside the card.


Folding card


This is a folding card with an old StampARTic tutorial by Marianne Skjeldtad from 2009. I have used Crinkle ribbon from Tim Holtz to close the card. The ribbon has been coloured with with distress ink.


The pattern on the half circles is a cutting file from Bird cards.


I have tried to use the differen Pion papers in different ways. This is the memory notes that are used. The stamp is from North Star Stamps.


The back of the folding card.


I hope you got inspired by these cards. I certainly got inspired by the Pion papers. Remember that we have a lot of tutorials over StampARtic and there is also a lot of tutorials and templates in this blog.

I am also entering these challenges:


søndag 16. november 2014

Prima's 12 days of Christmas cards - day 2


The challenge for day 1, was to use some of Prima's dies. I got the die leaves and flowers some time ago, and I love using them in between flowers


This card is made with Prima - Zephyr Collection -  Tempore. I have used Gesso and my own stencil design on the background.I have also doodled and written with black pen on the background.  The trees are dies cuts made from cardboard with Tim Holt's Snow tree dies. The trees has been painted white, and I have added paint and glitter.

I am entering these challenges:

lørdag 15. november 2014

Prima's 12 days of Christmas cards - day 1

Prima had just come out with a 12 days of Christmas cards/tags challenge, so my aim is to do as many as possible.

The challenge for day 1, was to use some of Prima's Glitter, and this glitter is "right down my alley". The white glitter is super to sparkle over gesso to get a super "snow effect".  I have also been looking for some nice Prima Christmas paper in the shops for some years in Norway (but have not seen any so far!). So, I challenge for myself is to use some of the gorgeous Prima papers (with flowers and a great summer feeling), to create winter and Christmas cards. This card is made with Prima - Zephyr Collection -  Tempore.


I have used Gesso and my own stencil design with a tire track on the background. I have also used Alcohol ink and different glass beads and white glitter.  The Merry an Bright is a stamp from Bo Bunny. The leaf dies are from Prima.


The car is a Tim Holtz dies from Sizzix: Mini Old Jalopy&Arrow. I have used an old cardboard box to to create the diecut. The diecut has been coloured with MetaMica. The wheels are Prima brads. The tree is made from Leaves made with a leaf punch and metal embellishments. The metal has been painted white with Gesso, and has got glitter sprinkled all over it. The lamp post is my own diecut design.


I am entering these challenges:


What you see - Art Journal

Some time ago I started an art journal. The art journal is a Mixed Media journal with art photos.Today, StampARTic's design team are inspiring you with doodling and writing in your art journal.


The photo is taken in Noosa (Queensland - Australia).


The paper is from Prima - Stationers desk collection. I have also used chipboard, buttons, metal, resin faceted cabochons and lace.


I have used distress ink and stencils to create the background effects. The brick background is chipboard from Wycinanka.


The metal and buttons has been coloured  with alcohol ink and MetaMica. The text "It's not what you look at that matters. It's what you see" is written with black pen on the page. I have also doodles some lines along the edges and written some words randomly on the background.


I am entering these challenges:

onsdag 5. november 2014

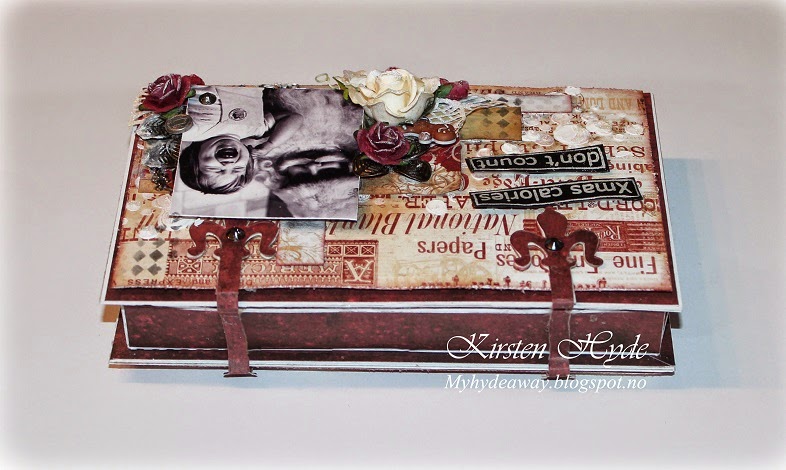
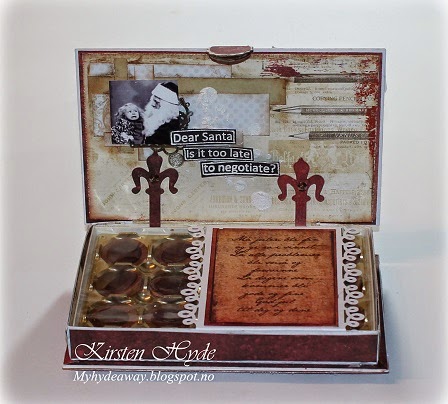
Toffifee Christmas box

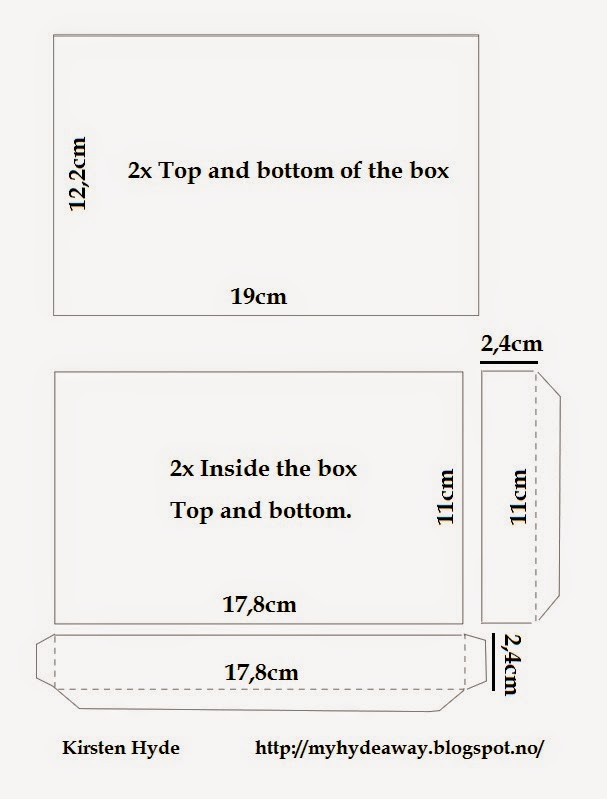
Today we have a review of old tutorials over at StampARTic. I chose to work with a box tutorial with my own measurements to fit a Toffifee box. The template with the measurements can be found at the end of this blogpost.


The papers are from Prima - The Stationer's Desk Collection. The box closes with a magnet.


Text stamps are from dylusions text stamps - Christmas words. Dies are from Prima and the photos are from Tim Holtz.


I have used the die cut from Tim Holtz - Hardware Findings to create the hinges. There is extra support inside the box tfor the hinges.


I have only used the inside of the Toffifee box inside my box. I have also used stencils, gesso, snowglitter and distress ink to create effects in the paper.


This is the measurements for the pieces I used to create the box. All pieces needs to be cut twice.

I am entering these challenges:


søndag 2. november 2014

First Christmas card, a pop-up card.

We have a new challenge over at Scandinavia paper fun. I decided to do a simple Christmas card as my DT contribution this time, but with some fun pop-up inside. Last year, I started too late with Christmas cards, So this year I had to start earlier. The aim was also to make a thin card (less than 2 cm), which means no flowers.


The paper is from Maja Design: When the snow is falling - A Gift for You. The image is from Studiolight - Scandinavian Winter, a diecut sheet.


Inside the card, there is a winter scene, and a pop up bench with the family sitting on the bench. The bench is my own design. The background paper is from Maja Design: On Christmas morning - A Gift for You. The santas are cut of the paper Maja Design: Packed by Santas Elves - A Gift for You. The "God jul" (Merry Christmas) dies is from Kaboks.
Related Posts Plugin for WordPress, Blogger...