onsdag 30. mars 2016

Large mixed media Prima canvas of old sewing machine parts

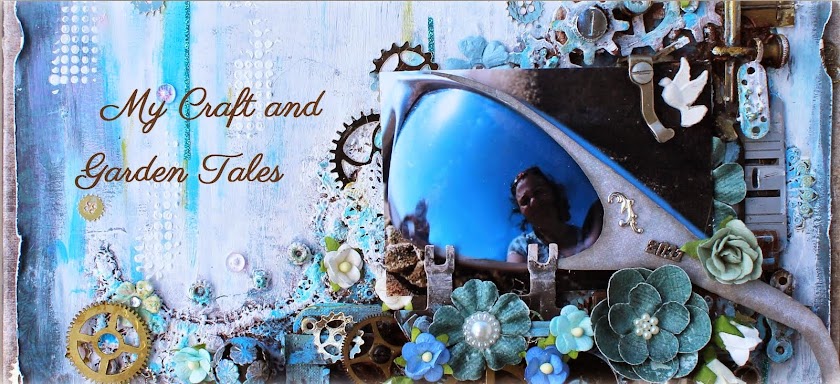
A few weeks ago, I dismantled 10 sewing machines, and collected all the small parts to create different mixed media items. I got a 40cm x 70cm x 2cm MDF board to create a wall piece for my living room with some of the swing machine parts, and lots of Prima goodies. The MDF board is light, but it is stronger than a canvas, since the piece is slightly heavy with all the metal parts.


The board was covered with papers from an older collection from Prima. The papers are slightly green. This colour was chosen to fit in with the interior in my living room.


The canvas is hanging over the over and old writing desk after my grandmother. The dress in front of the photo is a mixed media item created earlier (with tutorial) with Prima's Tales of you and me, fabric and fabric hardener.


So this is the box with the smaller items from the 10 sewing machines. 


Some of these items were used on the canvas. This is the result of gluing the metal items and some of the flowers to the canvas, before it was painted.


I have also added old lace and an old zipper. I have used Kaisermists, mists from 13arts and Color Bloom from Prima. I have also used Finnabairs new Opal Magic and MetaMica.


The photois of my little Jack Russell terrier.


I hope you enjoyed it.


mandag 28. mars 2016

A card folding class

In a few weeks, I will be holding a card folding class in Kjøpsvik, in Northern Norway. Two folding cards will be will be taught, a "Peek a boo card" and a tea light card. 

Peek a Boo card.

This is a card, where the motive changes as you open the card, from an image to a text.


I have use Prima's Tales of you and me collection for this card


The motive changes to a text, as you open the card.


The text inside is a stamp from Kaisercraft.


Tea light card

The tea light card is a small card, with four tea lights inside. 


The card has been decorated with papers from Prima's tales of you and me.


This class will be during Papirdukkenes vårtreff. It is possible to enter the class, even if you are not going the the scrapbooking retreat. Contact Helle Knutsdatter for more information about the retreat.

lørdag 26. mars 2016

Hjemmelagde sjokoladeegg med vaniljefyll og gul plomme (med oppskrift)

Hobbykunst har herlige farger som kan brukes til mat. Nå er det påske, så da har  vi testet ut noen av fargene og laget herlige påskeegg med hvit vaniljekrem og gul plomme. 


I tillegg er det brukt lys maissirup her. Det får du i litt større matvareforetninger. Hvis du ikke får tak i det, kan du prøve å bruke vanlig lys sirup istedet.


Vaniljekrem:

 1,5 dl maissirup
6 spiseskjeer myk margarin
1/2 ts salt
1 ts vaniljeekstrakt
8,5 dl melis


Sjokoladetrekk
400 g melkesjokolade


Til pynting:
En blokk Oasis
Aluminiumsfolie


Framgangsmåte

Bland vaniljekremen sammen. Fordel kremen i to boller. 2/3 av kremen i den ene bollen og 1/3 av kremen i den andre. Tilsett hvit farge til den største klumpen med krem og gul farge til den minste klumpen med krem og bland godt.


Sett kremen i kjøleskapet i 10 minutter, slik at den blir litt stiv. Ta ut den gule kremen og trill ut små kuler. Diameter ca 1 cm, ellers blir eggene for store (men det er en smakssak). 


Sett kulene i fryseren i 10 minutter slik at de stivner. Ta ut kulene og den hvite kremen. Nå triller du baller av den hvite kremen, trykker den flat og legger en gul kule inni. Rull den hvite kulen sammen, med den gule kulen inni. Form som små egg. Sett eggene tilbake i fryseren i 10 minutter, slik at de stivner igjen.


Nå skal eggene dekkes med sjokolade. Til denne oppskriften går det med ca 400g melkesjokolade.

Smelt sjokoladen i vannbad eller i mikrobølgeovnen. Ta ut eggene av fryseren og sett dem fast på små lollipopp pinner. Her er pinnene satt ned i en blokk med oasis, med aluminiumsfolie rundt. Dette er kun for at de skal stå stødig men sjokoladen stivner. Eggene kan også stå på en asjett mens sjokoladen stivner, men de blir penere dersom de får stå på en pinne mens de tørker. Sett hele blokken med pinnene inn i kjøleskapet i 20 minutter.


Fjern pinnen, ved å holde i pinnen og dra av egget med en gaffel. Da blir det ikke "fingermerker" i sjokoladen.


Da er det bare å nyte påsken videre.


God påske


Lagt inn av Kirsten Hyde.

fredag 25. mars 2016

Imagine - Prima summer layout

Prima has got a lot of fantastic new collections out. One of them is French Riviera. The background on this layout white Bazzill. Then I have used a sheet of Journees De Reves et Aventures


I have used mists ans sprays on the background. I have used a few strips from a Japanese newspaper and a few strips of paper from the only sheet that I had left over from a complete pad of 8x8 of French Riviera (I will post a large piece with this collection later). The ribbon with the metal bits are from an old sewing machine.  


The flowers are mostly from Prima. The text "Imagine" is from a sticker from Kaisercraft. These stickers have transparent background, which makes them super for layouts. The cotton string is from Rayher. I have also used  a brad from Rayher (new vintage brads) and different pearls.


This layout has been layered. I have tested out a lot of different 3D foam squares, and this time I tested out Thermoweb's foam squares. They came as a part of the product kit I got after the blogger event at CHA. They are thicker than the foam squares I normally use but I really liked them. 

I am entering these challenges:


torsdag 24. mars 2016

Mixed Media miniature wedding dress with tutorial

Some time ago, I got a bottle of fabric hardener from Deco Line to test out for Hobbykunst. I also got a lot of free Deco Foils and tape to test from Therm-o-web after favcrafts blogger networking event at CHA. I decided to test them both out, and enter the challenge after the blogger event. This came at the same time as Hobbykunst got the new Tales of you and me from Prima, so this collection was also used for the dress, together with lots of Prima flowers. 

I ended up creating a dress. A year ago I created another Prima dress, the Bella Rouge dress, and got a lot of questions about a tutorial for the dress. Therefore I decided to create a different dress, with with several tutorials.


The dress is made from cheesecloth and fabric hardener. (tutorial below) The dress has then been painted and decorated.


The flowers are mostly from Prima.


The letters "together forever" is from a dies from Sizzix - "Tim Holtz - Friend". I have also used Sizzix dies "Mixed media from Tim Holtz". The dies have been used on double sided sticky paper and used with DecoFoil (tutorial below).


I have used lots of bling (of different brands) and brads from Rayher.


At the edges you can see some of the golden DecoFoil. This has been fixed to the dress with glue.


The underskirt has been made of triangles of paper from The tales of you and me collection, sewn together. 


The finished dress


Tutorials:


Creating a dress form:


Creating the dress with 
fabric hardener, cheesecloth and lace


Decorating the dress


Deco Foil with double sided sticker sheets and dies

This was one of my challenges after the blogger event. I got a lot of products in the post, to test out after the event. So I decided to have a go. I had never used foil before, and took it as a challenge.


I am entering two challenges:


lørdag 19. mars 2016

Bliss a FabScraps minialbum with tutorial

Hobbykunst has just got the new collection Vintage Elegance from FabScraps. Today, I am showing a small minialbum with tutorial.


I have used Thickers on the front. These thickers has been painted whitewith gesso, to go with the papers. The flowers are from Prima - Tales of you and me.


Itis also created pattern and texture on the paper, on the cover. This is done with a stencil and gesso, glittertape from Rayher and foil. The foil makes a golden effect on the background. 


The golden effect with the foil, was my first attempt with foil ever. This was made with a sample I got after Favecrafts blogger event at CHA.


I have used stickers Stickers in between the text and the photos. These are cute 3D stickers with small animals and monsters and are superb for layouts and albums for kids.  


I have used a lot of photos from a photo shoot of a child in this minialbum. There are a lot of flips in the album, and this makes it possible to create a lot of "hidden" pages. The word "Wish" is a sticker from Kaisercraft, with transparent background. This makes it possible to see the pattered paper behind the sticker, only the black text will show. 


The photo will show when you open the flap under the page. All the text stickers in this album are from Kaisercraft. The circular dies is also from Kaisercraft (DD547).


I have used different techniques on the background. I have stamped, used glittertape, golden foil, gesso and beads. Flowers are from Prima.


The sideflaps can be opened, showing text and more photos. Along the edges of the flaps, I have used dies "decorated boarder" from Rayher.


I have sewn some acetate behind two of the flips on the side of the album. The acetate has been sewn in at the top and the bottom of the page. This creates a transparent pocket along the flips. Therefore, the card or tag under the flip will show and decorate in the album.


When you fold out the flaps, another layout is showing. I have used spray under the photo for effect. The text "Love" is also a sticker from Kaisercraft.


There is also a tag under the next transparent acetate pocket. The text on the acetate is a sticker from Kaisercraft, with transparent background. 


There is a small layout hidden behind the flap. The paper banners are from Rayher.


The back of the album is clean and simple, with a small banner and a "created by" stamp. 

Film of the album 

(Audio:Norwegian, text: English)


Tutorial

(Audio:Norwegian, text: English)


Drawings from the tutorial video with measurements:


I am entering these challenges:


Related Posts Plugin for WordPress, Blogger...