søndag 26. mai 2013

An Owl


For some reason, I like owls. The other day, I picked up a small Muji owl (from Åhlens) to be built out of cardboard. I wanted to learn how build one of these - so I had a go.

This is how the Muji owl looks after assembling.


The owl was painted with gesso and I added some MetaMica (Blue steel) on the wings and tail for effect. All the feathers are glued on to the owl one by one. They have been made, from punched and distressed flowers, where the petals have been cut of to make feathers. 


The base was covered with strips of paper, embossed with distress embossing powder (vintage photo and pine needles). I also added some Distress paint (Forest moss) and Gesso. The base was also decorated with roses, flowers from Prima and a Prima bird.


I am entering these challenges:


fredag 10. mai 2013

A paper vintage-steampunk dress and handmade dress form.


I have seen a few people decorating paper mache dress forms. I have thought of decorating one for a long time, however - I wanted to explore the possibilities of making the dress form as well as a dress for it. The dress form here is about 38cm tall. The base is a cheap candle holder from "Plantasjen" (a plant shop!). I cut a piece of round wood to fit in the candle holder. The wood goes all the way through the dress form. The dress form is made from a  free pattern I found over at "The diy dish". I modified the patterns slightly before I made mine.


The dress itself is sewn from coffee filters, and decorated with reused lace. 


The corset is made from Primas Lifetime Collection "Familia".


The necklace is made from a part of an old jewellery.


The decoration on the dress is made from Mathia leaves from Hobbykunst, Prima flowers and handmade roses (made from Primas Lifetime Collection "Familia"). I have added Gesso to some of the flowers and leaves. The large gears are a Tim Holtz dies and are made from aluminium cans, cork, cardboard (from an old box and chocolate wrapping).


When I made the dress, I made the decision to make it with a zip in the back. The dress is sewn as a doll dress, which can be taken of the dress form.


The corset is fixed at the back with ribbon. 


I am entering these challenges:


fredag 3. mai 2013

Clean and simple - a card in a hurry


This was a card in a hurry to enter Ett trykk's challenge - clean and simple week 5 - Challenge 15. Well I thought I had one more day to enter the last part of a 5 weeks challenge - but found I had only 1 hour to make make something and enter it. Having entered 14 projects out of 15 so far in the challenge - I was not going to give up!  So I made it a challenge just to find something on my desk. Used Martha Stewart edge punch, a diecut (can' remeber the die) I had on my desktop. The stamp is from LeeZa Gibbons- Wishes and Dreams.


torsdag 2. mai 2013

My dog's nose art - a pop up card.

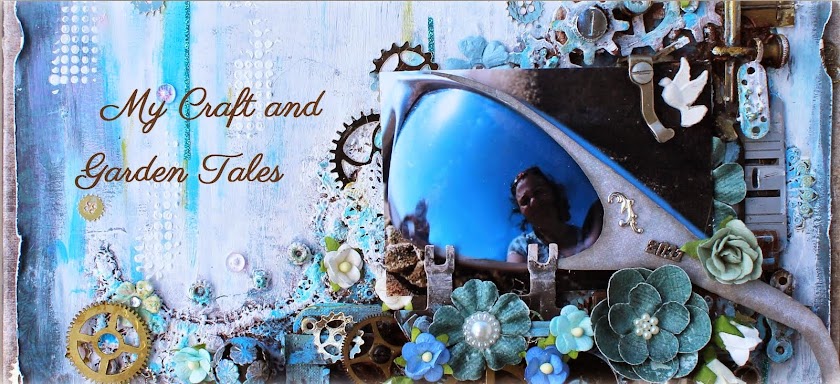
Yes -  my dog leaves nose art on some of my windows. This card is inspired by my dog. This is my DT submission for Kort o Mania this fortnight - on the anything goes challenge.


This card is a Pop-up card, with my own design. The background paper is  from Kaisercraft - Periwinkle Collection. The inside pop - up flaps in the card has been made of a sheet of clear plastic - to give the embellishment a 3D - pop up effect. The chair, lamp and birdcage has been cut with a silhouette.


The stamp is a digistamp from Kenny K. - Col Macallan. The stamp has been coloured with promarkers. I have also tried to decorate it with paper piecing using the silhouette to cut the pieces - since they are so small.


The birds are from a Graphic 45 paper.


The front and the back of the card. The window in this card has been cut to fit the dogs face.


I have made a sign on the front of the card "My windows aren't dirty......That's my dog's Nose art!" This is printed on Kraft. I have also left this as a freebie for you.


_________________________________________________________


Templates and Copyright - Please read.

This is my own template. You are free to use my templates, and publish your own craft. However, it would be nice if you link back to me. Please do not sell or publish my templates, as they are or edited! My templates are copyrighted by law.

Dette er min egen mal. Du kan fritt bruke malen til å lage dine egne arbeider. Du kan også fritt publisere ditt eget arbeide. Jeg ville imidlertid satt pris på om du linket tilbake til meg. Du har ikke lov til å publisere eller selge mine maler, som de er eller redigert. Mine maler har copyright under Åndsverksloven.

_________________________________________________________

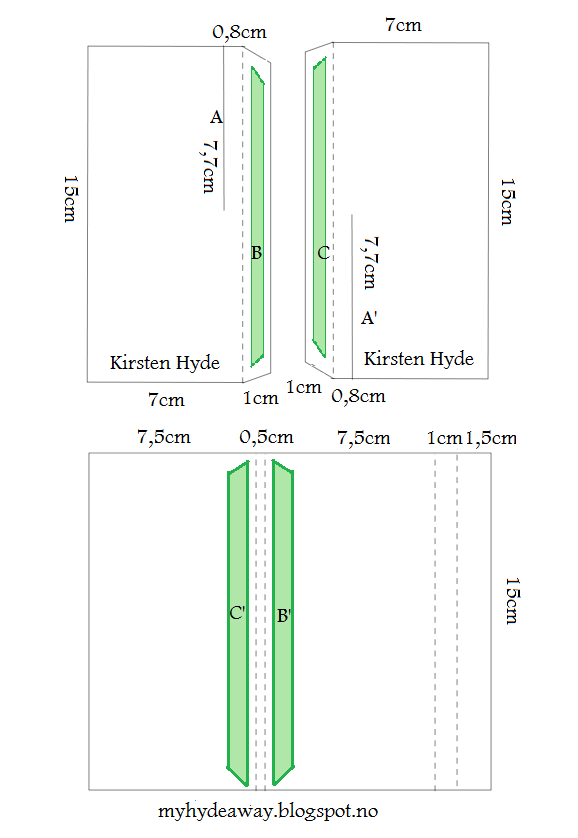
Building the pop up card:


  1. The two top parts are my clear plastic flips inside the card. Cut them out and fold along the scored lines. Fold the plastic several times along the scored line to make the flipping of the tap smooth. Put A and A' together, so the two plastic cards crossing at one of the long sides. Tape them in position with clear tape, so they don't fall apart.


  2. Cut the bottom template out of card stock - this makes the card itself. Fold along the scored lines. Glue tab C from the plastic pop - up sheet to C' and the B flap to B'. I also made stitched line with a sewing machine to make sure the flaps would stick to the card.
  3. Now you can decorate your card.


I am entering these challenges:

Related Posts Plugin for WordPress, Blogger...