Viser innlegg med etiketten Wild Orchid craft. Vis alle innlegg

søndag 12. november 2017

A mixed media horse

Today, I am showing a mixed media horse for the magazine - The papercrafting.


The horse was found at "Kremmerhuset", some time ago. I added metal charms, flowers, pieces from old type writers, pieces from old sewing machines, styrofoam, microbeads and half beads. 


I often use Liquitex heavy gel as mixed media glue. This glue will dry over night, but it is sticky, and will hold the pieces in place before it is dry. 


The horse was spraypainted white. Then I used 13 arts sprays/mists, Kaisermists, gesso and Finnabair's wax to create coloured effects. 


More photos:


torsdag 20. april 2017

Mixed media canvas

Art is often expensive to do. The paint, glue, pencils, mists, paints and embellishments, are often a huge cost. A few weeks ago, I got a craft magazine with some free emellishment pack. This had a few thin wooden pieces. I decided to a few mixed media pieces, out of the free wooden pieces. I then decided to only use left overs, from my craft room, to see what I could create without using a lof of money. Note: You do need good quality glue, paint, mists and paintbrushes. Do not save money on this.


I added string around the wooden piece. Then I glued on beads, metal and flowers. Then, the wooden piece was spray painted black.


Then, I added Kaisermists in blue colours. After this had dried, I dry brushed with Finnabairs Art Alchemy acrylic paints - Sparks, Magical Pond and Metallique Emerald Green. I also added sprays of 13 arts golden mist.


onsdag 5. april 2017

Mixed media Easter egg

Easter is soon going to be here. This year, I have only decorated a few Easter eggs. This is one with my favourite colours, white and blue.


The Easter egg has been created with a simple cardboard Easter egg.  Flowers and embellishments has been added, and then it has been spray painted white.


The flowers has then been spray painted blue and dry painted with white and blue. The mists are from 13 arts and Kaisercraft. Paint from Finnabair's collections.


The little text "blessing" is a sticker from Kaisercraft.


Wishing you a happy Easter

fredag 31. mars 2017

Handpicked for Hedgy - a summer card

The spring is getting here in Norway. We have cold winters with lots of snow and ice, so the spring is always welcome. Today, I am showing a card, using the sweet stamp Handpicked for Hedgy, for LDRS creative. This is a stamp, that gives me that good spring spring feeling. 

The die set, used for the edge around the stamp, is the Fancy Rectangles and layers die set

The papers are from Prima's collection - Tales of you and me.


 I often decorate my cards inside. The Fancy Rectangles and layers die set is also fantastic for creating space for a personal message inside the card.

Wishing you a fantastic spring.

mandag 27. mars 2017

Mixed media Easter egg

It it soon Easter, and the Easter egg production has started for a lot of crafters. This is my first mixed meda Easter egg this year, and it's done for The papercrafting.


This Easter egg has been created with left over materials, like flowers, metal, a zip and beads. I have also used Prima's molds and filed them with hot glue. After the glue dried, it was added to the egg and painted.


______________

How to create projects like this?

Start with finding what you would like to alter. You can find a lot of old things at home, at a flea marked or in different shops. This Easter egg was bought a few years ago (for 1NOK/ 10 pence (GBP)/ 0,1 USD)

For projects like this, you can use old flowers in strange colours, old lace, metal pieces, pearls and molded glue pieces. You can also use pieces from old type writers, computers and sewing machines. Here, you can save a lot of money. Use a good glue. I like to use Liquitex heavy gel. Don't save money on glue, get a good kind of glue. Leave the glue to dry overnight, before you paint. 

At the end, spray paint the project. Let this dry, and then dry paint the project. Use a good paint brush. A good result depends on a good paint brush, and very little paint on the paintbrush at the time. Using the right technique is important.

_______________________


I have also used Prima's Prima - Wild & Free collection - Let's Be Adventurers on the side of the egg.


The text on the side is from Prima's Let's Be Adventurers  paper.

fredag 10. mars 2017

Heart box with template and tutorial

This is a tutorial written for the magazine - Ett trykk, February 2016


My first item in print, was a little paper dress, created from coffee filters, in a heart box. The box was based on a the shape for many similar boxes found online. I really like this shape, and like the way the box opens at the top, just by squeezing it. 


Heart box tutorial


Materials:

Paper: Maja design, Summer time - Smell the roses. White bazzill og acetate. 
Ink: Archival Inkpad - Jet Black, Tim Holtz: Vintage Photo - Distress Ink Pad 


Template:
Tutorial:


Cut out the pieces according to the template. Score along the dashed lines. 
If you want a transparent front, use acetate for the front piece. Also cut an extra piece of the heart top in Bazzill. 


Fold along the scored lines. There are only a few types of glues that will stick to acetate. Use a good double sided tape like score tape. Mount the little top of the heart, to the front of the acetate, at the front of the box. 


Mount panels to the inside of the box. It is important that you decorate the box inside, before you mount it together. This decoration is difficult to do, after you have mounted the box together. 


Glue under one of the squares at the bottom, and glue that square over the other. This is creating the bottom of the box. 


The bottom of the box has been mounted together. The inside of the box has been decorated.


Mount Score tape on all the acetate glue tags. 


Mount the acetate tags, under the box. Then, mount the acetate tags at the side of the box, at the back - outside the box. It could be a good idea, to keep the back strips of the Score tape on, until you are going to glue ut. 


The box itself, has been created. Add the panels in patterned paper to the back, and under the box. a piece of patterned panel paper to the front - top heart. 


The box is now finished with panels, and can be decorated.


The front of the box, has been simply decorated with a home made flower, a small text and leaves.


The back of the box has been simply decorated with a stamped text, roses from Wild Orchid
and Mathia flowers.


lørdag 25. februar 2017

A Mixed Media Trowel with Patina effect

I have worked with patina and rust for some time. A lot of artist has done paint brushes and spoons, so I decided to do something else, a trowel. 


I have used a mixture of bits and bobs from different brands, Prima molds, Wild Orchid roses, Kaisercraft gear dies, beads and Tim Holtz quotes. 
 

Paints are also from different brands.


This is a mixed media class that will be given in Northern Norway in April. The information about the class is given below in Norwegian.

____________________


Mixed media kurs


Tidspunkt: 

21-23 april 2017 på Papirdukkenes treff i Kjøpsvik. Kurset varer ca 3 timer.


Pris: 

Kurset koster 450kr og inkluderer materialpakke, 
samt endel fellesutstyr som du får låne på kurset. 


Send mail eller pm om du vil melde deg på kurset.


Dette må du ha med på kurset:

Saks
Limpistol med lim
Pensel til tørrmaling (ca 1cm bred)
Heat gun / Varmluftspistol / Embossingpistol

____________________________


søndag 22. januar 2017

Mixed media on Styrofoam?

A few weeks ago, a few of us at Hobbykunst was discussing the idea of creating some mixed media on a styrofoam medallion. This had to be tested, and here is the result. 


The styrofoam medallion was mounted on a wooden stick. The wooden stick was then mounted on a wooden spool.


I used old jewelry parts, metal pieces, beads, metal from Finnabair, and different kind of bling. I used Liquitex heavy gel as glue and let it dry over night.


The medallion was painted black. When the paint had dried, it was painted with white acrylic paint, cobber, and different blue Finnabair paints and different mists. Then I added flowers. 


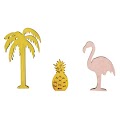
In between the flowers and the mixed media, I mounted a wooden flamingo and a little wooden palm. These are from one of Rayher new wooden sets.


The other side has been decorated in a similar but different way.


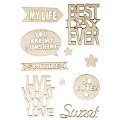
The word "Sweet" and "Smile" is from a new wooden text set from Rayher.


Materials used:


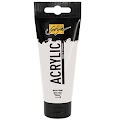
 Isopor - Medallion 10 cm  SOLO GOYA Art Acryl Basic 100 ml Black  SOLO GOYA Art Acryl Basic White 100 ml tube  Liquitex: Super Heavy Matte 
Prima: Finnabair Art Extravagence Rust Paste Set Tredekor - Live & Love, 10/Pkg Caribbean dekor, str 3-4 cm, 15/Pkg American Craft: Gold - Microbeads 
Strassbånd - sølv, 2.7 mm bredde 


Related Posts Plugin for WordPress, Blogger...