Viser innlegg med etiketten Rust effect. Vis alle innlegg

mandag 15. april 2019

Mixed media Easter egg

As the last Easter egg for this year, I am going to show you an egg inspired by a canvas created by one of Finnabair's designers, Olya Kravets. Finnabair has got some fantastic designers on her team this year, and they are giving us so much inspiration, so we can get ideas to be crafty with her products.  I often follow other designers to learn and study texture, colours and techniques. I am also asking you all to support and follow other designers, follow blogs, you-tube channels and follow them on instagram. Learn, copy to learn, and support other designers (but  give credit, when credit is due) :) 


The base of the egg was a cardboard egg. I started with creating texture for the top of the egg, where the rust effect is. Here, I added gesso with a sponge and added old left overs thick letters and beads. I painted over it black, dark brown and light brown in places, with Finnabair's rust paste. I waited for this layer to dry, before I added the next layer.


The next layer was the blue layer. I added paper tissue a piece of cardtock, with liquitex medium. Then I painted it blue with thinned Finnabair acryllic paint and white gesso. When the paint was dry, I riped a long strip of the card stock, and glued it to the edge of the rust effect. I added some old stars, from some of my first scrapping stash.


Then I added stripes of white card stock to the edge of the blue paper. I added Liguitex thick medium to the edges, to create a smooth edge between the edge of the papers and the edge of the egg. I painted the last part white, and added thinned out silver paint from Finnabair to the edge of the egg. I also added half beads in different sized and painted them in silver.


Happy Easter


tirsdag 13. november 2018

Mixed media canvas with chalk and rust paint

Today, I am showing a Finnabair inspired canvas with chalk and rust paint.


The base is an MDF piece, covered with sacking. After this, I glued on pieces of left over wood from the Rayher car. This shows that a lot of things can be used to create mixed media, also things that you think you can throw away. Then I added different metal pieces, wooden pieces, half beads, beads and flowers
.

Everything was spray painted black, before the sacking was painted brown and got a few strokes of Folk Art's rust paint.


Then, all the raised pieces got painted with different Chalky paints and got a few strokes of Extreme sheen Bronze and silver. Under the heart, I glued some of Finnabair's glass glitter


Created for Hobbykunst.

torsdag 23. august 2018

At the bottom of the sea

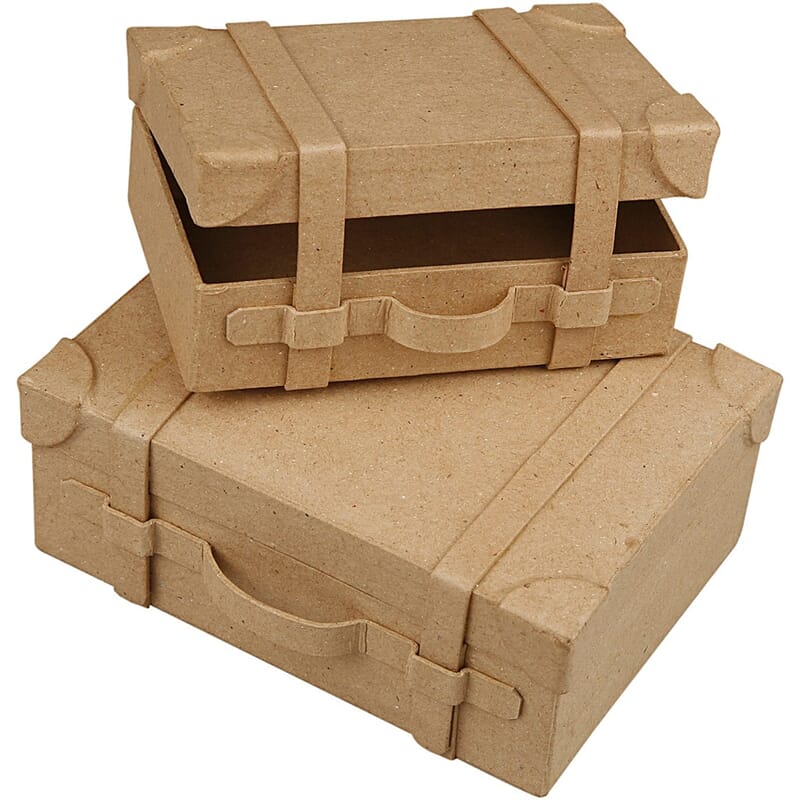
Some time ago, I got a small suitcase to work with for Hobbykunst. There are two suitcases in the set, and I used the largest one for this project. My task was to create something in 3D inside the suitcase, and I also wanted to do something in Mixed media.

The result was a suitcase from "the bottom of the sea".


Inside the suitcase, I added a small octopus. 


The octopus has been created with air drying clay. Inside the head, I used a small acrylic ornamentGlass eyes can be bought from Hobbykunst. The octopus was painted in blue, lilac, green and yellow. 


The hair on the octopus had been created with thin thread. The motive in the lid of the suitcase and the turtes arefrom Graphic 45's collection - Sun Kissed.


The suitcase has been decorated with lace, wooden figures, beads, buttons and jewelery, before it has been painted brown. 


Then the suitcase has been dry painted for effect with rust paint and mose paint


Then I added shells. Some of them I have found on the beach, and some was from the set Maritim decor. I also added a small bottle with a piece of paper as a bottle post. 


Enjoy :) 

onsdag 13. juni 2018

Vintage suitcase trolley in Harry Potter style

Some time ago, I got a challenge from Hobbykunst to decorate a small trolley. I was asked to make it in a rusty style. I decided to create a vintage suitcase trolley in Harry Potter style. 


All the suitcases are rather small and they are hand made from papers from Maja design's Sofiero collection. I used the papers Princess Margaretas GardenStrolling down the Rose path og Enjoying the fragrance together with white Bazzill.


The trolley is a miniature model of a suitcase. I glued on microbeads from Finnabair with Liquitex heavy gel.  After this, the trolley has got a few strokes of Folk Art rust paint.


The suitcases has been created, making small boxes and adding corners and handles. 


I added different metal charms, a bird huse, shoe, fotball, a spade, a guitar and a little owl.


On the little chest at the back, I aslo added a little tag.


The owl has been created, gluing two owl charms against each other.


Several of the suitcases has been distressed at the edges with Vintage photo distress ink


mandag 9. oktober 2017

Prima canvas with silver and patina

I have always liked Prima's papers and products. I have often seen the Patina effects with cobber and rust, but not to often togehter with silver. Thw new collection Stella Teal is full with silver and green - blue colours. Using this collection was a fantastic opportunity to use the patina effexts together with silver.

This canvas was shown in The papercrafting.


The canvas is 12 x 12 inches. The papers used are Prima's Zella Teal collection - Floral Stories og Collect Memories


I have mixed a layerd layout with mixed media. The mixed media sides were created first, and the middle with the layout were added later.


The photo is an old photo. Sometimes it is good fun to find some of those old photos from the photo album.


The mixed media part, can be seen along the edge. You can see lace, bits from old swing machines, nuts and bolts, a small pair og metal scissors and gears from old sewing machines and in cardboard. You can also see some of the rust effect in between the patina. 


The photo has been added with cardboard in between the layers. There are flowers, fussy cut leaves, wodden gears and metal added in between tha layers. 


There are also small pieces of  thread between the layers. 


tirsdag 23. mai 2017

Mixed media mask, with papers from Papirdesign and mediums from Finnabair

There are a lot of new products on the marked at the moment. There are new paper collections and mixed media products.


This time, I have decorated a mask from Hobbykunst, with new papers from Papirdesign, new structure paste from Rayher and Finnabair's wax and rust paste. 


The mask has been covered with Papirdesign's new paper - Eksos og Olje. I have used multi medium glue to stick the paper to the mask. The glue is also used on the top of the paper, to seal the paper.


Then, I added flowers, metal and plastic parts to the sides of the mask, I used Liguitex heavy gel as glue. 


Rust paste has been added for effect. 


The plastic parts, flowers and metal has been painted in silver. I have also used Finnabair's wax on in some places for effect. 


Materials used:

 Maske i hvit papp - Katt 18x17cm, med strikk Papirdesign: Eksos og olje   FolkArt Faux Paint Kit - Rust
 
Struktur pasta - Silver, 150 ml
 
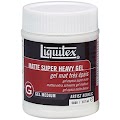
Liquitex: Super Heavy Matte Acrylic Gel Medium
LX5816
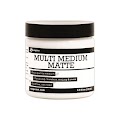
Liquitex: Super Heavy Matte Acrylic Gel Medium Ranger: Multi Medium - Matt, 113ml  


tirsdag 14. februar 2017

Planner inspiration

On Sunday, I had an article published in The papercrafting about planners. This article is more of an introduction to planners, and different from this blogpost. 

I am probably not the most active "planner girl", but I do like my planner. For me, it's a way to keep organised with work, deadlines, DT posts, and keep track of some of the creative ideas I get along the way. I have a Carpe Diem, that I got last year. I only have one planner, but like to have everything in one place. The planner is rather large, and yes, I did have to get a new hand bag that was large enough for the planner. 


Last year, I had a large pencil case, that I brought with me, together with the planner. It kind of got to me, because it was to much to carry around. Therefore I made a pencil case, that would fit inside the planner, and could be put in the ring binder. As a quilter (and this might be a bit embarrassing), there was not a problem to find materials in the same colour and pattern as the planner, in my little collection of materials.....  The pencil case is large enough for a few markers, pencils and a pair of scissors.


This year I have also adventures into "Sticker World" and created my own stickers. They have been created using a Silhouette (Print and Cut). To test it out, I started with some freebies found online from Vintage glam studio. You can also find a list over sites that offers planner freebies at Amberdowns. There is often restrictions to freebies like this. They are often only for personal use. If you use them, and show them online, please link back to the actual site where you found them (not Pinterest or Google). I also used some free Silhouette cutting files, to create stickers from them. In the end, I ventured out in the world of designing my own stickers.


This year I also added a plastic pocket with a zip to the planner, for storage. I have also added some plastic pocket pages to the planner. These has been created with a fuse tool. 


This year, I had a different calendar in my planner. There was no monthly dividers. I created my own monthly dividers with the silhouette. The idea is to create some layout pages on these monthly dividers with some photos and quotes. 


One of the pages is this simple page. The text is a Norwegian quote "It's to late to blow your nose, when your nose has gone". 


Here is a Tim Holtz inspired page. The stencil is from Tim Holtz. Rust paint from Finnabair. The photo, is one I took at CHA last year.


The two last pages are full with post it notes and a note pad. I use the note pads rather a lot. This makes it easier to colourcode the different tasks and DT jobs.
Related Posts Plugin for WordPress, Blogger...