Viser innlegg med etiketten Birthday card. Vis alle innlegg

lørdag 18. mars 2017

Birthday card with a new stamp release from LDRS creative

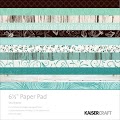
Today, I am showing you a card with one of LDRS creative's new stamps from their new collections. The stamp is a Candi Bean image, "Happiness in a cupcake". This is a fantastic sweet stamp, perfect for all those birthday cards. The image has been painted with distress ink on water colour paper. The paperpad used here is from Kaisercraft's Time machine collection.

The die set used for this card is the Fancy Rectangels Layers Die set. In Norway you can get this die set at Hobbykunst. These dies has also been used inside the card, to create space to write a message.

I normally decorate on the inside and back on my card, although quite simply.


tirsdag 7. februar 2017

A Birthday card

Here is another card created for LDRS creative, using one of their new stamps. This sweet new birthday stamps from LDRS Creative, "Have a micest day" is from the Candi Bean collection. The image has been coloured with distress ink on water colour paper. The patterned papers are from Kaisercraft's Sea Breeze collection.


I have also used the Fancy Rectangles & Layers Die Set to cut the image and create the tags. I have used the Picnic Quilt Embossing Folders to create the embossed pattern on the background of the card.


The embossing folders has also been used to create pattern as the background on inside of the card. The dies has been used to create space for a little message inside the card.


Materials used:

LDRS: Fancy Rectangles & Layers Die Set Little Darlings: Picnic Quilt Embossing Folders Kaisercraft: Sea Breeze Paper Pack


Happy crafting

torsdag 24. november 2016

Birthday party invitations for a little girl

Sometimes you just need those simple invitations cards for a birthday or a party. The party time collection is fantastic for those invitations. 

I have created a set of 15 simple invitation cards for a birthday party. The cards have been made quite simple. 


I have created three different cards, and five of each card. I have used the images from the Carousel (P2197) paper as images and some of the wooden embellishments from the collection. 

For the first card, I have also used embossing powder, to create some effects on the background paper.

On the second card, I have used som string as a decoration, under the image..


The third card is simply decoratad with the wooden birthday text.


Kaisercraft products: Party time collection: P2200 Cotton Candy | P2197 Carousel | FL589 Flourish Pack Party | CD101 Coconut Weave Cardstock.
Other: String, white embossing powder.

torsdag 2. juni 2016

Birthday shaker card with Olaf and Sven.


A lot of kids really appreciate hand made cards. The cards can be quite simple.

Hobbykunst has got the the fantastic new papers with Minions and Frozen figures. Here, I have created a simple shaker card for a boy with Olaf and Sven.


Arket er tatt fra Disney's Frozen blogg.


This paper is one of two paper sheets chosen from the Frozen paper pad.  You can find what I created with the girl paper pad in this blogpost.


A lot of boys do like the Frozen film, and would really like a card with some of the figures from the film. Although they would often like the card in a more masculine cersion, without any princesses. Olaf and Svein are super as figures on a card for a boy.

It is very popular to create shaker cards, but often crafters don't want to make complicated cards for a kids birthday. This shaker card is simple to make. 


Creating the shaker card

Here, the cellophane bag and the patterned paper, has decided the size of the card. The piece of paper has been added inside the card. Then, the snowflakes and beads has been added to the bag. The bag has been locked in the top, and a piece of bazzill has been added to the top. The bazzill has been scored and folded after 2cm, and folded to create the back of the card.


Decorating all the sides of the card?

It is not always you want to decorate all pages of the card. However, I think it is nice when all the pages are decorated, and the card seems more "finished". 


This paper has a cute back side. This paper shows inside the cellophane envelope. The rest of the inside of the card has been decorated with left overs from the paper. I have also used a diecut, created with a die from Papirdesign. Olaf, inside the circle, has been cut out of white felt.. I have used googly eyes. Arm, mouth and eyebrows has been created with Cotton thread.


There was not enough paper for a complete panel on the back. Therefore, I have used two pieces with a paper band, created from the paper, in between. 
lørdag 16. januar 2016

Birthday card with Kaisercraft

This is a simple card, created with the Treasured Moments collection from Kaisercraft.


I have used the papers as they are on this card, just adding the butterfly. I think these papers are great for creating those simple cards,


Kaisercraft Products: Papers: Treasured Moments collection:  P2014 Nostalga | PP287 Paper Pad | CD101 Cardstock Weave – Coconut | CT846 Collectables.

lørdag 9. januar 2016

Easel frame card

I have created a set of cards with the Treasured Moments collection from Kaisercraft. This is the first card.


The card is a shadow box card, created out of the small frame from one of the papers in the paper collection. 


When the card is flat, it looks like a shadow box card.


There is room for writing a short message on the back of the card.


Kaisercraft Products: Papers: Treasured Moments collection: P2012 Timeless  | P2015 Ponder | PP287 Paper Pad | CD101 Cardstock Weave – Coconut.

torsdag 6. august 2015

Gold, Gold, Gold - You are invited

The Touch of Gold selection is a fantastic selection to create something for a party. I have created a selection of cards, a place card, a hat and a cake pop scene - all ready for a party.


Cake pops scene


The base for the cake pops scene is a block of oasis, for flowers. I covered the oasis with paper and added the golden strip with the paper bow.  The paper bow has been cut out of paper by freehand. You can get dies for this, but it is not needed. The lollipop cards have been create with several rosettes. These rosettes have been made, using a scoring board and paper. No additional dies are needed. The golden edges on the rosettes have been made using a edge punch, before I scored the paper.

Cake pops recipe:
2 packets of Oreo biscuits , 200g Philadelphia cheese.
Crush the Oreo biscuits and add the cheese. Make small round balls out of the mixture and add a strew or a cake pop pin to them. Put them in the freezer for 20 minutes. Melt chocolate (white or milk chocolate) and cover the cake pops with chocolate. It is a good idea to use something like a block of Oasis to leave them in for the chocolate to dry. Keep the cake pops in the fridge until you are going to serve them.


The paper hat has been made out of a 6,5 x 6,5 inch paper. I create a cone by gluing two sides that are 90 degrees to each other together, and cutting of the left over paper at the bottom of the cone. Then I decorated the edge og the cone, added another rosette and made the pompom for the hat out of golden paper strips.  The invitation card is a simple center step card with a "You're invited" stamp in gold.


The thank you card is a clean and simple card. The banners have been sewn on with a sewing machine. I added the little tag from the Collectables and mounted it to the card with 3D tape. The I added the little wood peg with glitter.

Kaisercraft products: A Touch of Gold paper pad PP976  |  Speciality paper Pin Stripe PS421  |  Sticker sheet SS290  |  collectables CT834  | Stamp set CS234  | Cardstock Coconut Weave CD101 and Liqurice C102  |  Other: Golden paper and clothes pegs in different sizes with golden glitter.

tirsdag 2. juni 2015

A mixed media tag for a boy with Pion papers

This is a tag made with Pion's wedding papers for Hobbykunst. 
I wanted to see if I could create a Mixed Media card for a boy with the papers. 


The papers are: Wedding dress - Vintage Wedding from Pion and brown Bazzill. The tag with the gear dies, is one I have designed myself. I have used Prima Bloom Spray on the background paper.


The vintage image is from one of Hobbykunst's papers. The metal and charms is from Korthobby. The text is a wood icon from Prima.


onsdag 25. mars 2015

Working with alcohol ink on backgrounds

We are inspiering you with alcohol inks at StampARTic today. Alcohol ink is always an interesting to use. It gives so many oportunities to colour different materials and backgrounds and inspire me to test out new ways of using it. 


Today, I am showing an acetate based card. The edge is made from Prima's - Seashore - Seahorse paper. The motive is from Pion, but most of the other papers and embellishments are from Prima.


I have used alcohol ink to create some background colour on the acetate, at the edge of the motive. The background has been built up with layers from paper, wood icons, metal, flowers, beads and glitter. At the end, some of the background was also coloured with alcohol ink


The back of the card. The card stand is a free cutting file from Birds Cards.

Prima PPP


I am entering these challenges:


tirsdag 10. mars 2015

A Prima Birthday paper bag

We have a new challenge over at Scandinavia Paper Fun. This time, the challenge is birthdays.


I have created a small birthday bag with papers from Prima - Prima - Something Blue Collection - Enchanted Blooms. The "Happy Birthday" die cut is a silhouette file. Flowers are from Prima and Wild Orchid.The wooden butterfly is from Prima. I have distressed the edges. I have also used my own number stencil and used gesso to make an effect on the paper. There is also a lot of small metal beads and small metal charms among the flowers.


The "Happy Birthday" die cut is a silhouette file. This box was filled with 9 small punches and given as a small birthday treat for a 5 year old girl - who really wants to start cardmaking.


I am entering these challenges:


tirsdag 4. mars 2014

A birthday card

We have got some new inspiration from StampARTic. This time it is birthdays. 


This time I made a birthday card, using a digital stamp from Saturated Canary and coloured it with Prismacolor. The butterfly punch is a memory box die. Roses are rolled with left over paper.  The clay butterfly is homemade from a modge podge mold.

I am entering these challenges:


onsdag 26. februar 2014

Chemists have all the solutions - a masculine birthday card


I was challenged with two stamps from 2012 from Kreativ Hobby. I made a masculine card for a 70th birthday, for a science teacher. The card is an easel card, and I have mounted a small test tube on the card.


The male is a free stamp that came with an English magazine this month. The gears are die cuts of cork, with Tim Holtz gears dies.


The test tube is filled with tiny silver pearls. The background paper is from Prima. The paper has some "spilling effects" on it,  although I have made this effect more visible with distress ink and a TH stencil.


 I have made an effect on the blue background paper with different stamps. The text: "Chemists have all the solutions" is a digital stamp I have made myself - you are free to use it.


"Create good memories for yourself and those you love". The text stamp is a stamp from Kreativ Hobby, I masked part of the text.I also got a stamp with hearts, which is one of the stamps used to create the background. The metal clock and "handmade by" hand on the test tube is from KortHobby.


A lot of people ask me if I decorate the back and the inside of cards. Yes I do, but often very simple.

The card is published at StampARTic as a part of their sponsor article.


Free digital stamp in Norwegian "Chemists have all the solutions". 
You may use it, but please link back to me.


I am entering these challenges:


mandag 10. februar 2014

A birthday card for a little sailor

We are working on reuse of things from the kitchen at StampARTic. 

I made a card using an altered "diaper fold". This is one of the cards that will be included in my ABC card maker class.


The image is a finished coloured topper Sheet from Mo Manning (Hobby House: Sailor Crew) The gears have been cut out of a Balsamico vinegar box. 


The seaweeds are made of a plastic box, that came with a box of salad leaves. I have seen  branches being made of shrink plastic and coloured with alcohol ink. I wanted to find out if plastic, that I normally throw away - also can be used as Shrink plastic - and some of it can! I cut out the seaweeds with scissors, used the hot air gun to shrink it, and coloured it with alcohol ink.


The mast and sails is a tag, which can be taken out. I have made a flag out of Washi tape in the top of the mast. 


There is room to write a message on the back of the tag.


I am entering these challenges:


Related Posts Plugin for WordPress, Blogger...