mandag 12. mars 2018

Minialbum with Kaisercraft's Wandering Ivy

Kaisercraft's wandering Ivy is fantastic and sweet, and it's super for sweet cards, layouts or minialbums. The collection has green and blue colours in fantastic flower patterns. 


This mini album has been created in the same way as the minialbum in this blogpost..


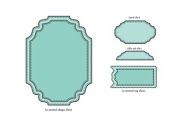
You can get the collection in individual sheets or the whole collection. I have also used April Calendar from Bo Bunny, with sweet motives on one side, and fantastic wooden pattern on the other side. The tags in the front are madde with LDRS creative's Fancy Rectangles & Layers Die Set. The little dragonfly has been made with a die from the Allifair Build-A-Card dies set.


I have calculated 1 cm between each page. The album has four pages, and it's 5 cm thick. Inside all the pages, there is a tag, created with LDRS creative Fancy Rectangles & Layers Die Set. This is one of my most used dies, so if you are going to invest in a set of dies, I would recomend this one. 


The pages in the album:


Video of the album:


Materials used:  
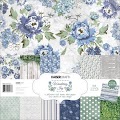

Kaisercraft: Wandering Ivy, 12x12 LDRS: Fancy Rectangles & Layers Die Set, 5/Pkg LDRS: Allifair Build-A-Card dies 
LDRS: Grace Build-A-Card Dies  LDRS: Regal Frame Die Set
LDRS: Dotty Doily Die Set Bazzill: Smoothie - Coconut Swirl 
UHU Flinke Flasche - Universal lim, 90 g Limputer, str 5x5 mm, tykkelse 2 mm

søndag 11. mars 2018

Golden on the inside

I thought of decorating at least one Easter egg this year. I had a lot of acrylic sea through Easter eggs in my studio, that I have wanted to decorate for some time. I now found them, and got inspired by Prima's challenge this month - #PrimaColorChallenge. I got out a lot of my Prima stash, and started the project. 


The finished egg was decorated on the inside with a golden touchm and on the outside with the fantastic green - blue paint from Finnabair.


The egg was first decorated with golden leaf and Finnabair's paint on the outside of the egg. This would be seen through the acrylic egg, so thinkig through the colours to start with was important. I started with decopage glue and golden leaf, and painted with Finnabir's paint after that.


Then I added die cuts to the outside of the egg, together with lace.


I also added lots of micro beads, and beads. Then I spraypainted it black. Then I added more of Finnabair's paints as dry painting, to create a dimentional effect.


Flowers and leaves were added, together with lots of Prima bling.


 Some og the micro beads can be seen under the flowers.


The flowers got painted with some diluted paint and golden wax.


The egg can be opened to fit a litte gift or some sweets.


Ready to fill the egg


Wishing you a Happy Easter.


lørdag 10. mars 2018

Choose to shine - a layout

A few years ago, it was so popular using plastic overlays. These days, the overlays seems to have been forgotten in Norway. I came over a sale on Rayher overlays at my local craft shop, and wanted to have a go on using them again. This ended up as an article written for The papercrafting. 


The photo was taken in New York a few years back, and edited i Photoshop. 


I have used an overlay from Rayher, and papers from Studiolight's new Industrial 2.0 collection (from Scrappehjertet).  This collection is full of fantastic rustic patterns. I have also used dies from the same collection - Nr. 67, 68 og 70 and stamps: Nr 254. I have also used a stencil with numbers from Tim Holtz and StazOn, since StazOn is fantastic to use on plastic. 


I have also used Prima's Amelia Rose flowers - Scribbles, an old car charm and "choose to shine" text from TIm Holtz. 


Holding the layout over a different  background, you should see the effect of the overlay.


Does anyone else have thos overlays in the craft stash and want to start using them? 

onsdag 7. mars 2018

Dandylion wish - a spring card

It is cold and still a lot of snow in Norway, event though it's supposed to get closer to spring. The card is a spring card, perfect for this season.


I have used the sweet Dandylion wish stamp together with the Lovelette dies, that has been used as a lace effect in the background.


The motive has been cut out with the Fancy Rectangles & Layers die set.


The papers are from the Lovely Lilacs - 6x6 Paper.


I often decorate inside the cards. Here, I have used the Fancy Rectangles & Layers die set to create space for a personal message.


The back of the card has been decorated with hearts from the Lovelette dies set.


Wishing you a crafty day :) 

fredag 2. mars 2018

Unicorn cards - Enhjørningkort

This is a set of simple unicorn cards created for Hobbykunst. The cards, super simple to create from 3D stickers and paper from Rayher.  The cards are simple and not to expensive to create. This makes them super for birthday invitation or birthday cards for kids.

The following text will be in Norwegian.


Vi har vel alle trengt noen helt enkle barnebursdags eller invitasjonskort, som er enkle å lage, ikke koster så mye og som blir godt mottatt av barnet. Her kan du lage 8 kort i slengen for omlag 12 kroner kortet (Ca 90kr for 8 kort) (dies er ikke inkludert i prisen).


Her er det brukt det nye søte, prikkete mønsterarket "Glitter dots - Light purple" til Rayher. Prikkene er med glitter! Enhjørningmotivene er 3D klistremerker.

Skal du ha enhjørningsbursdag, har også Hobbykunst flere andre enhjørningseffekter.


Kortene


Kortene er laget på en hvit kortbase i 10 x 10 cm i hvit kartong. Sammen med mønsterarket "Glitter dots - Light purple er det brukt foil ark i gull.


Motiveneer er 3D klistremerker og settet inneholder både 4 enhjørninger og andre motiver. Alle ark er festet med 3D puter for å lage en 3D effekt.


Den hvite kartongen i midten er dieset ut med Fancy Circles Dies fra LDRS. 


Baksiden av kortene er pyntet med et enkelt banner, laget av stempel og diecut, med blomst i midten. Disse kortene skulle være enkle og er derfor ikke pyntet inni.


tirsdag 27. februar 2018

The Challenge

Almost a year ago, I got a challenge from a good crafty friend, Ingvar Kvinnesland, also called Dilly Dally among other scrapbookers and cardmakers. I was planning to do the challenge, but since changed so much this past year, I was waiting to get the crafty mojo back. This challenge has been on my desk, and kind of "kikking" me a bit. Now, as my mojo is comming back, and life is setteling in a new place, I took the challenge. And this is the result (written for the Papercrafting in Norwegian).


The Challenge:

This was the items I got to create somthing with:


The plant had to be altered. The ribbon had to be altered. Only two of the die cuts could be taken away. The chain could not be alteredd. Alt least one of the wodden bits had to be used. Since a lot of the diecuts were in pink, I decided to keep the finished result in pink colour tones. The finished result was a mixed media layout. 


Finished Mixed Media layout:


The background is an old paper from Prima. The pattern has been made on the background paper with th Tim Holtz stenzil from the challenge, gesso and white glitter. Then, die cuts, lace, chipboard and embellishment was added in layers. The photo was taken at sun rise by Uluru in Australia. The photo has been added in a metal frame from an old clock.


The grass had to be altered, and has been colourd with Kaisermist. At the end, I have also added some sprays og gesso to the layout.


Challenges like this is fantastic fun. Try to challange someone else, and you might inspire someone greatly.


lørdag 24. februar 2018

Bloom where you are planted

 Today, I am showing you one of the cards on show for Creativation.


The stamps are from the lovly new stamp set Let Love Grow. The papers are from the Cotton candy paper pack.


I have used 3d foam tape between the layers for dimention.


The inside of the card has been decorated with a strip of patterned papter, diesed out with the heart dies from the Lovelette stamp set at the top at the bottom of the strip. I have also created space for writing a personal message with a diecut created with the Fancy Rectangles & Layers.


Hoping you have a creative day :) 
Related Posts Plugin for WordPress, Blogger...