onsdag 25. oktober 2017

The best day - A birthday card

Today, I am showing you a birthday card created with the super sweet "All dressed up" stamp set from LDRS creative. 
The papers are from the Tea Time paper pad. The green paper has been embossed with Timeless embossing folder.
The shape of the card has been created with the Allifair Build-A-Card Die Set. These build a card die sets are fantastic to use to create cards, because you get everything you really need in one set. 
The motive has been cut out using the Fancy circle die set and the Dotty Doilie Die set has been used to create the boarder around the motive.
Enjoy your crafty week. 

torsdag 19. oktober 2017

To love and be loved - layout created for Kaisercraft's Workshop magazine

This layout was created for Kaisercraft's workshop magazine, with the Rose Avenue collection while I was DT for Kaisercraft. 


The collection is soft pink and sweet.


The layout has been created in layers, with bricks stamped at the background.


You can see the instructions on Kaisercraft's Home page.

Kaisercraft products: Rose Avenue Collection – P2406 Patio, P2413 Chalet, P2409 Wood Panels, SS349 Rose Avenue Sticker Sheet, CT892 Rose Avenue collectables, Rose Avenue Flourish Pack, IP731 Ink Pad Sml Berry, CS299 Brick Wall Texture stamp. KM110 Kaisermist Pink, Pearls – SB716 Blush and SB788 Plum.

Other: gesso


søndag 15. oktober 2017

Christmas Wishes layout

This layout has been created with the new Mint Wishes collection from Kaisercraft - a super sweet collection. 


I decided to use two of the same patterned papers with the trees as background paper, to create the mirror image of trees in the ice.


I use wooden papers to create the bottom edge and used some of the collectables and wooden embellishments as decoration.


The trees have been created with Kaisercraft tree dies.


The animals, are black and white photos in different sizes.


INSTRUCTIONS:

Photo: Fussy cut animal 3cm, 5cm and 6 cm (1 ¼”, 2” and 2 3/8”) tall.

Cut a piece of FOREST (reverse) 13,5cm (5 3/8”) from the bottom, keeping the forest part of the paper. Cut a second FOREST (reverse) paper 19 cm (7 ½”) from the bottom, keeping the forest part of the paper. Keep the smallest piece of paper at the top. Turn the largest piece of paper up side down, and glue it underneath the top paper. The paper should be 29,5 cm (11 5/8”) tall together. The two papers should show a forest just above the centre of the page, and the reflection of the forest underneath. Cut the side of the page, so the page now measure 29,5cm x 29x5cm (11 5/8” x 11 5/8”). 

Mount black cardstock behind the background paper, to create a black frame behind the layout. 
Tear pieces of FROSTED (reverse), and add the to the bottom of the page. Leave the FROSTED (reverse) 4cm to 6cm from the bottom of the page. Add the layers of FROSTED (reverse) paper strips with 3D foam tape to add dimension. Add a thin 1cm teared strip of FROSTED (reverse), just below where the two pieces of FOREST (reverse) paper meet, at the centre of the page.

Die cut trees with the Fir Trees die from the FRESH PINE and left over from the light part of the FOREST (reverse) paper. Add some gesso to some of the trees. Add the trees above the FROSTED (reverse) paper strip, to create dimension to the forest. Add some of the greenery from the Collectables in between the trees. 

Create tussocks with the grass die from the Decorative Die and Stamp Tropical Beach and FRESH PINE paper. Create two leaves from the leaf die from DD707 Layerd Flowers and FRESH PINE paper. Add gesso to the leaves. Add the tussocks along and just underneath the teared FROSTED (reverse) paper at the bottom of the page. Add the white flower from the collectables to the bottom left side of the page. Add the leaves underneath the flower. Add tiny green pearls in the centre of the flower. Add the text “Be Jolly” from the Flourish Pack to the bottom right side of the page. Create to banners with left over paper from FROSTED (reverse) and FLANNELETTE. Add the Christmas Wishes circular collectable to le left of the “Be Jolly” text, with the wo banners sticking out from the left side of the circle. Cut out the words “Believe”, “Peace” and “Joy” from the FRESH PINE (reverse) paper and add these around the forest part of the page. Add the animals to your layout on the mirror part of the forest on the background paper. Add green and white beads.


Kaisercraft products:  Mint Wishes Paper collection – P2397 Frosted, P2398 Fresh Pine, P299 Flannelette, P2405 Forest (x2), CT891 Mint Wishes collectables, Mint wishes Flourish Pack, Decorative Dies -  DD565 Fir Trees, DD948 Decorative Die and Stamp Tropical Beach, DD707 Layerd Flowers. Pearls – SB173 Pearl, SB796 Green.  CD603 Cardstock Premium Black.

Other: gesso


lørdag 14. oktober 2017

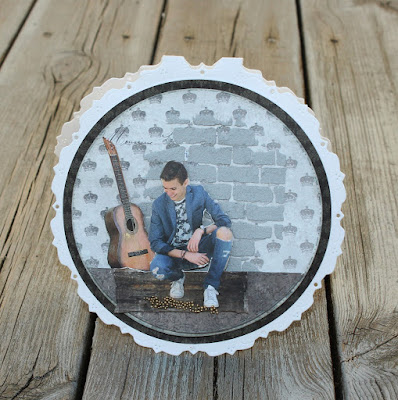
Card with LDRS dies and concrete paste

Hobbykunst has got lots of new dies from LDRS - creative. Here, I have made a card with the sweet new set of cardmaking dies - Grace.


I have used papers from Maja's Nyhavn collection and motives from Maja's Denim and Friends. 


At the background, I have used a brick stencil from Tim Holtz together with Rayher's concrete paste. This paste is fantstic to work with, together with stencils.


Wishing you a happy weekend.

onsdag 11. oktober 2017

25th - Layout created for Kaisercrafts Workshop magazine

 This layout was created while I was on the design team for Kaisercraft, featuring last months Letters to Santa collection - P2390 Santa’s Workshop. 


Kaisercraft products: Letters to Santa Paper collection – P2390 Santa’s Workshop, P2396 Christmas Traditions, PS501 Perforated Wishlist, CT890 Letters to Santa collectables, Letters to Santa Flourish Pack, Decorative dies – DD179 lace topper, DD547 Circle Vines, DD347 Numbers, DD129 Words The Little Things, DD924 Decorative Die & Stamp Tailor Made. EM434 Gold Pearls String. Ink Pad sml - IP728 Saffron and IP723 Vintage. Cardstock – CD603 Premium Black, CD651 Kraft, GC107 Glitter Golden. F653 Mini Paper Blooms Ruby.  KM102 Kaisermist Antique Gold.

You can see the instructions on Kaisercraft's home page

I

mandag 9. oktober 2017

Prima canvas with silver and patina

I have always liked Prima's papers and products. I have often seen the Patina effects with cobber and rust, but not to often togehter with silver. Thw new collection Stella Teal is full with silver and green - blue colours. Using this collection was a fantastic opportunity to use the patina effexts together with silver.

This canvas was shown in The papercrafting.


The canvas is 12 x 12 inches. The papers used are Prima's Zella Teal collection - Floral Stories og Collect Memories


I have mixed a layerd layout with mixed media. The mixed media sides were created first, and the middle with the layout were added later.


The photo is an old photo. Sometimes it is good fun to find some of those old photos from the photo album.


The mixed media part, can be seen along the edge. You can see lace, bits from old swing machines, nuts and bolts, a small pair og metal scissors and gears from old sewing machines and in cardboard. You can also see some of the rust effect in between the patina. 


The photo has been added with cardboard in between the layers. There are flowers, fussy cut leaves, wodden gears and metal added in between tha layers. 


There are also small pieces of  thread between the layers. 


søndag 8. oktober 2017

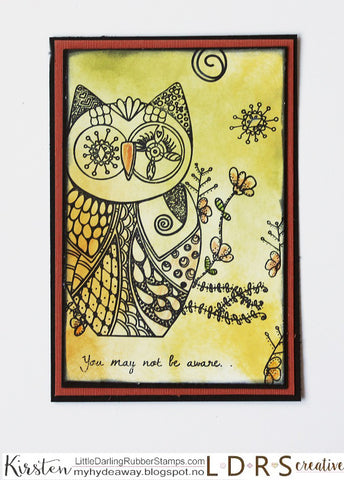
You may not be aware.... two CAS cards

Hello everyone. Today, I am showing you two CAS cards.

I just love all the different stamps from LDRS creative. I often create things with lots of details and embellishments. Sometimes, it is good to create something outside your comfort zone.  I have not used the Hooty Owl stamp before, so I decided I was going to use this stamp to create two simple cards.


I created my own simple coloured background with distress oxide and stamped over it with Hooty Owl - Stamps & Dies set.


Part of the patterns on the card was slightly coloured with Prismacolours.


I wish you a happy crafting day.

fredag 6. oktober 2017

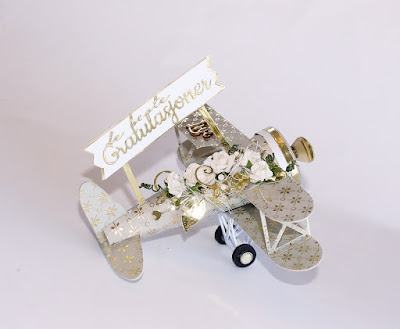
Paper airplane with template

It is a fantastic feeling to be able to create something nice for a special celebration. This airplane has been decorated for a wedding, but can also be  decorated for child or other occations.


I have used the super sweet papers with golden foil from Anna Griffin - Ivory Gold - Charlotte Foil Cardstock. This collection is super for all those wedding projects.


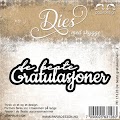
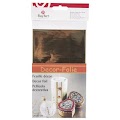
Golden foil is from Søstrene Grene. and the "congratulation text" is a die from Papirdesign.


All the flowers here are Mathia flowers. Sweet, simple and inexpensive from Hobbykunst. 


This tutorial and template was in print i August's issue of Ett trykk


Template


Tutorial


Cut out the wings. There is two sets of wings, and you need double layers of paper to create stability. AIt is also nice to have patterend paper on both sides of the wings. Also cut out the airplane body, tail (also double for stability and to have patterend paper on all sides). THe front circle has been created in white cardstock on this plane. 


Glue along the fold - shown with double sided tape here. Use good double sided tape or good glue. I like to use Score tape or Uhu glue. GLue together so the body of the plane looks like the photo below. 


Fold down the tags at the front and glue the circular front to the plane. 


I also created strips and circles of golden foil for decoration along the front of the plane, and along the cockpit. I have not added templates for these. If you would like them, measure the circles on the plane/ template to create them. These has no other function than decoration.


Golden circles and strips added to the plane. 


Support between the wings. Glue two and two together. This is for extra support and to have patterned paper on both sides. 


Glue two and two wings together for extra support and to have patterned paper on both sides.


Mount the wings on the plane. The wing with the half cicle to the top of the plane. Mount the support between the wings, between the wings. 


Mount two and two tail pieces together. This is for extra support and to have patterned paper on both sides. 


Glue the horizontal part of the tail, onto the vertical part of the tail. Cut strips in the tail part of the plane, so the tail can slot into the tail part of the plain. Add a bit of glue, to make sure the tail is not falling of. 


Air plane with wings and tail.


Cut out two propellars. Glue them together,  with patterned papter outwards on both sides. Mount the propellar with a brad. Use a nut or simething similar between the propellar and the plane. This helps the propellar to turn around. 


THe plane is finished, and you can now mount the wheels. 


Glue the support for the wheels together. I have added several white pieces to the support and glued them on i layers. This is because I wanted it to be stronger, and to be able to hold the weight of the plane. 

Also glue the wheels together to get two thick wheels.


You end up with a good support and thick wheels.


The plane is finished and can be decorated.


Materials used:

Anna Griffin: Ivory Gold - Charlotte Foil Cardstock Mathia: Roser m/stilk, 15mm - Hvit, 48stk Mathia: Roseknopp 15mm - Hvit, 40stk Mathia: Roser 25mm - Hvit, 24stk

Bazzill: Criss Cross - Lily White
T101032D
Bazzill: Criss Cross - Lily White Bazzill: Foil - Gold Papirdesign: De beste gratulasjoner 2 dies LDRS: Grace Build-A-Card Dies, 10/Pkg
Lock-Itz - Heart Bouquet 3D Glue for foile, 51 g, transparent Decor metallic foil, 20x30 cm, gullfarget, 1/Pkg Puncher - Sirkel, 1.9cm 3/4 inch
UHU Flinke Flasche - Universal lim, 90 g Liquitex: Super Heavy Matte


You can also see the wedding album I created with the same collection from Anna Griffin:


Other planes with the same template:


 Planes inside a Christmas ornament. The planes are about 2cm long.


A baby box with a plane, created for Kaisercraft.


Related Posts Plugin for WordPress, Blogger...