torsdag 12. januar 2017

Mixed media with chalk, rust and concrete paste


Hobbykunst has got some really sweet frames in MDF. This is one of the frames, decorated with chalk paint and concrete, together with a hint of rust. 


The frame was first painted in light blue chalk paint. Then I added concrete paste. This paste is soft to work with, as thick paint, and easy to spread with a sponge or paintbrush. When the concrete paste dries, it hardens, and it is good for adding other paints, mists or mixed media layers on the top. 


The background inside the frame, is a patterned paper from 
Prima's collection "French Riviera" -  Journees De Reves et Aventures. This collection is a collection I have used a lot. This was my last paper from all the piles of paper from this collection. 


I have created the mixed media picture in layers. I have used Kaisermists on the background paper, and stamped onto the misted paper with background word stamp from Kaisercraft and a ruler stamp from Technique Tuesday - Measure Up. I used Archival ink for the stamping, as it is not water soluble. 


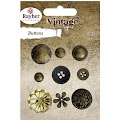
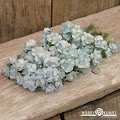
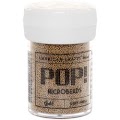
Then I have added layers with micro beads, metal, computer parts, painted with rust and copper paint. There are also some copper buttons mixed with Prima and Mathia flowers. 


Materials used:

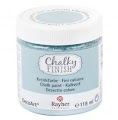
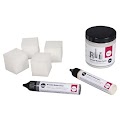
Fotoramme - størrelse 17x13x1.5cm Prima: Journees De Reves et Aventures - French Riviera Chalky Finish - blue grey Kreativ Betong Paste, sett 
FolkArt Faux Paint Kit - Moss Prima: Finnabair Art Extravagence Rust Paste Set Technique Tuesday: Clear Stamps - Measure Up Liquitex: Super Heavy Matte 
Vintage knapper: Mix Vintage Gold, 9 stk Mathia: Roser m/stilk, 15mm - Lys Blå-Hvit, 48stk 
American Craft: Gold - Microbeads
AM27350
American Craft: Gold - Microbeads 
Ranger: Archival Inkpad - Jet Black
AIP31468
Ranger: Archival Inkpad - Jet Black 


mandag 9. januar 2017

A little forest friend, and a new Design Team


 I was thrilled to be invited to be a part of the LDRS creative team, just before Christmas. This is the first card I have created for LDRS.


My first card for LDRS is this card with one of their own stamp and die sets; North Woods. I have used the stamps to create a little forest scene . The images have been simply coloured with distress ink.


The papers, High Tide, and wooden icons are from Kaisercraft. The die used here is the Fancy rectangle die set  from the Creative Basic set. 


I often decorate my cards quite simply inside. I used the rectangle die to create space for writing a personal message inside the card.


Materials used:


LDRS: North Woods - Clear stamps & dies set LDRS: Fancy Rectangles & Layers Die Set

mandag 2. januar 2017

Mixed media canvas - inspired by Finnabair

In the end of September, we had crafty days at Hobbykunst. During the crafty days, I had a demo in mixed media - dry painting and painting rust effects. During the demo, I worked on a canvas, that I finished a few weeks afterwords. The canvas is very inspired by Finnabair's work.


The right side of the canvas, has been created using lave and Finnabair's sculpture medium. The lace has been added in ruffles. The sculpture medium makes the lace go hard, when it dries. This is fantastic to work with. I have added old zippers, screws and metal springs around and between the lace. At the left, I have added a thick piece of cardbard. I have used several pieces of cardboard under it, to create depth in the canvas.


I have used old pieces of a sewing machine on the left side, together with different metal and plastic bits and bobs. I have used liquitex heavy gel as a glue. The canvas has been painted black. Then the right side was painted with Finnabair and Folk Art rust paint, and the left side has been painted with Finnabair's Art Alchemy, Opal Magic and Mica powder.


Here, I have tried out both Finnabair's and Folk Art's rust paints. They are very similar and they are just as good as each other. 


The rust paint's are simple to use. Paint the area black first. Then paint large areas with the dark brown paint. Make sure some of the black paint shows in some of the valleys. The rust paint has texture, and should be a bit lumpy. Use a paint brush or spunge. Apply the lighter rust paint here and there.


The light areas has first been painted white, Then, I have used Mica powder,  Art Alchemy and Opal Magic paint, to create some of the colour onto the canvas.


The wing itself, is a chipboard wing, that I found on the till at Hobbykunst this summer. This wing was in a basket full of shipboard pieces on the till, for a good price. Dont't miss good offers like this, and visit your craft store, to see if they have any good offers. 


Materials used:

Liquitex: Super Heavy MattePrima: Clear - Finnabair Art Extravagance Sculpture Medium Prima: White - Art Basics Heavy Gesso 
SOLO GOYA Art Acryl Basic 100 ml Black FolkArt Faux Paint Kit - RustPrima: Finnabair Art Extravagence Rust Paste SetPrima: Opal Magic Blue/Gold - Art Alchemy Acrylic Paint 
Prima: Gold Rush - Art Ingredients Glass Glitter Viva Decor: Gold - Inka Gold 


fredag 30. desember 2016

Top 10 for 2016


2016 has been a fantastic year. It started with getting some of my artwork shown at CHA, at Kaisercraft's stand. Four of my layouts and a paper dress was picked for the stand. I also visited CHA in January. This was a fantastic trip.

I posted every day from CHA. You can see lots of photos and films from CHA- spring 2016 in my blogposts for January 2016:


The 1870's paper dress


This dress was created for Kaisercraft, in one day, and sent around the world to Australia. Then the dress was shipped to America, to be shown at CHA. When CHA was over, I picked up the dress, anb brought it with me home. The dress managed a trip around the world without being destroyed. 

Finnabair's rust pastes


Finnabair showed a lot of fantastic new products at CHA. The rust pastes was something I really have enjoyed working with this year. 


The Graphic 45 tram


Laura Denison had designed a tram for Graphic 45's stand. I got a task from Hobbykunst, to create a tram with Graphic 45's City scapes. I decided to create a Norwegian version, and created it to look like Oslo's first tram.


Small mixed media canvas


This is a small canvas, created with lots of Prima and Kaisercraft products. I also created a tutorial for the canvas.


Large Mixed Media canvas


This was a large mixed media canvas created this spring. The canvas is 40cm x 70cm. The canvas has been created with Prima papers and products and has become quite a dear canvas for me. A lot of the items used, is from old sewing machines, buttons, zips and Prima flowers. I do sew a lot, so this was made with that in mind. The photo on the canvas is of my dog, who passed away this summer. 


Confirmation wishes


This is a confirmation set, created with papers from Papirdesign for Hobbykunst. The tutorial for the shoes, card and pop-up box, can be found in the blogpost.


The Prima Wedding dress


This dress was created using fabric hardener and some of Prima's new flower and paper collections this spring. The dress was created with I have a tutorial for the dress in the blog. I have used deco foil on the dress and entered Fave Crafts competition after the Bloggers Networking Event after CHA.

Vintage compass box with a minialbum


This is a compass box with a minialbum. All the papers are from Prima's French Riviera collection. The binoculars are hand made, and they do work.


Minialbum with a vintage camera box


I had been on Kaisercraft's design team for a year, and I decided to try for another year on the Kaisercraft design team. Applying for Kaisercraft, you apply for the first round, and then they have a second round with the top 25. Everyone who enters the second round, gets a collection to work with for the second round. I must admit, I do like this kind of application. There are so many people applying for these designteams, that I do like the idea of a second round. I got onto the design team for another year, and I am really happy for that.

Christmas ornaments


I have created a large amount of Christmas ornaments this season. This ornament is one of them. The ornaments has been with small planes, vintage gramophone, vintage cars, houses, churches, towns and with a hint of steampunk.


Design teams and magazines

This year I have been on Kaisercraft's and Hobbykunst's design teams for the start of the year. At the end of the year, I started writing for The Papercrafting and Ett trykk. I have also been asked to be on the design team for Little Darlings - LDRS - creative, and will start with that from January. 


Wishing you all a happy new year.
torsdag 29. desember 2016

A Christmas ornament with a little Christmas scene.

 The last Christmas ornament this year, is a larger ornament than the last ones. This is 10cm in diameter, so I thought of placing two houses in the ornament to create a Christmas scene.


The papers are from Maja's Summertime collection, together with some white patterned paper for the roof.


The little tree is from Rayher.


The Christmas acrylic ornament is also from Rayher. 


Enjoy the last few days of your Christmas week.

Related Posts Plugin for WordPress, Blogger...