mandag 8. mai 2017

Beautiful - a chabby chic layout


Today, I'm showing a chabby chic layout with the wonderful and sweet Sage and Grace collection in Kaisercraft's blog.


The image is the view over London from the top of London Eye.


I have added some texture to the background, using one of Kaisercraft's stencils and gesso.  Strips of paper, lace and cheese cloth, has been added to the background. Flowers has been added under and between the layers.


The pink diecut behind the photo, and the pjoto has been added, using 3D foam tape.


Butterflies and sentiments has been added. I also added some of the left over die cuts from pink paper under the photo.  I used a background text stamp, to create some effects on the background. The layout got a light mist of white Kaisermist spray in the end.


Kaisercraft Products: Sage and Grace collection: P2312 Render | PP1019 Paper Pad | CT881 Collectables | EM926 Lace Pack White | IT924 Designer Template Textures | CS261 Sentiments Moments Clear Stamps | DD583 Square card front die 2 | KM111 Kaisermist White.

Other: Cheese cloth, gesso and buttons

lørdag 6. mai 2017

Smile generously

Today, I have created an Easel card with the ballerina in the All dressed up stamp collection.


 The image has been coloured with Prismacolours. The image has been cut out with a die from the Fancy Rectangles & Layers Die Set.


The fence has been made with a fence die from the Allifair Build-A-Card Die Set. The leaves has been made with a die from the Grace Build-A-Card Die Set. The white swirls with hearts are from the Lock-Itz - Heart Bouquet die set.


The text is so sweet, and it's from the Magnolia Splendor stamp set. 


The paper pad used here, is the new Soft Blush - 6x6 Paper Pack


Materials used:

LDRS: Soft Blush 6x6 Paper Pack LDRS: All Dressed Up Cling Stamps  LDRS: Fancy Rectangles & Layers Die Set 
LDRS: Allifair Build-A-Card dies, 9/Pkg
LDRS: Grace Build-A-Card Dies Lock-Itz - Heart Bouquet


Wishing you a fantastic weekend

fredag 5. mai 2017

Time - layout shown at Kaisercraft's stand at CHA 2017

I had a lot of layouts featered at Kaisercraft's stand at CHA this year. This layout is showing the High Tea collection.


__________________


INSTRUCTIONS:

Photo: 10cm x 8cm (3 15/16” x 3 1/8”)

Start with the background paper TEA TIME (reverse). Tear away the “torn” part of the background paper, right – bottom side. Glue the paper CUPPA (reverse) behind the tear. Stress the torn sides of the TEA TIME paper, to create dimensions. 

Add a few blue and white rectangles from the HIGH TEA paper pad, behind the photo. The pieces has to be slightly larger than the photo. Ad them with 3D tape or cardboard between them to create dimensions. Add the photo with the paper rectangles to the page, top right hand side. 

Diecut some gears from the white glitter cardstock. Tuck them in between the layers of the paper under the photo. Cut out a banner with chevrons from the CUPPA (reversed) page. Add them, with 3D tape, under the photo, right side. 

Cut the text from the bottom of the BISCUIT (reverse) paper. Add the text to the centre of the page.


___________________


Kaiercraft products: High Tea Paper collection - P2278 Biscuit, P2280 Tea Time, P2283 Cuppa | 
PP1017 High Tea Paper Paper Pad | GC104 Glitter Cardstock Crystal | DD706 Decorative Dies Cogs | SB713 Pearls -  Pearl.


torsdag 4. mai 2017

The adventure begins - Kaisercraft's May Challenge


Kaisercraft has a new challenge. This time, it's a bingo challenge. I have created a layout for this challenge. 

You can find the Bingo challenge over in Kaisercraft's blog. I have used the letters P - Photo, T - text and F - flowers


The image was taken in Daintree rainforest in Queensland in Australia. 

I have added strips of distressed paper in layers. Then I added the photo.

The flowers has been added, and they have got some gesso on them for effect. The background has been stamped with the swirl stamp, from the clear stamp collection. 


Kaisercraft Products: Bombai Sunset - P2319 Sari | PP1020 Paper Pack | CT882 Collectables | CS301  Clear Stamps | SB702 Rhinestones Hot Pink | F663 Hot Pink Paper Blooms | F634 Paper Blooms Sunset | F651 Mini Paper Blooms Sunset | F668 Hot Pink Mini Paper Blooms | IP729 Ink Pad sml Tangello | IP731 Ink Pad sml Berry

Other: Gesso

tirsdag 2. mai 2017

Fotball party - invitation, place card and pop-up card

It is soon confirmation time in Norway. I have had a lot of questions about ideas for invitations and place cards. Here , I have created a set of invitation, place cards and a pop-up card with a fotball theme. 


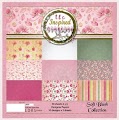
The papers are from Papirdesign's new collection with a fotball theme. I have also used the stamps  "Velkommen til konfirmasjon" from Papirdesign.


Invitation

The invitations are quite simple, as you often would make a lot of these cards.  


The card has been made in black bazzill, with panels on all sides of the card. In the front side, it has been stamped with "Invitation" on white cardstock. I have also mounted a wooden fotball on the white panel. The green paper behind the white carstock, is the reverse side of the fotball paper. 


At the inside of the card, I have used panels with fotball paper, and a white panel to write a personal message.


The back side, has been decorated with a panel and a "made by" stamp. 


Place card

Hand made place cards are always nice. Very often, you would like nice place cards for a big party. However, they would also need to be quite simple, since you often have to make a lot of them. 


Here, I have created a step card with grass colour and fotballs. 


Here, you can see the step card with the support underneath. 

Template:


Tutorial:


Cut and score the card according to the template. Fold along the scored lines. Glue under the tag at the bottom right side of the photo. 


Glue the tag under and behind the first step of the card. 


Glue the steps to the bottom part of the card. This makes the card stand on it's own. Decorate with panels. The fotball has been glued on a piece of acetate. The acetate has been glued to the card. This makes it look as the fotball is in the air. I have also added a sign with a name on it. 


A pop - up congratulation card


The congratulation card, looks like a simple card, although it has a suprise inside. 


The card has a belt around it, that will hold it flat. Here, I have used motives from Papirdesign's new collection "vinnere".


At the inside, I have decorated with panels and a pop-up ball. 


How to create pop-up balls like this:

This way to create pop-up balls, is well known from the pop-up book world and advertising world. Sissix has also got a die, for creating pop-up balls like this. 


The ball has a rubber band inside. This is what makes the ball pop - up, when you open the card. 


The ball has been decorated with panels, and has been decorated. 


The ball can fold out, as you close the card, and will pop open as you open the card. The belt around the card will keep it closed, and will keep the ball flat. 


The back of the card is simply decorated with panels and a "created by" stamp. 


Materials used: 

Papirdesign: Fotball er livet Papirdesign: Mååål Papirdesign: Vinnere 
Papirdesign: Velkommen til konfirmasjon
Wooden objects - Soccer Kaisercraft: Ebony - Alphabet StickersEpoxy dots - NeutralUHU Flinke Flasche - Universal lim, 90 g 
Bazzill: Smoothie - Blackberry SwirlBazzill: Smoothie - Coconut Swirl


Tags: #papirdesign #konfirmasjon #pop-upball #pop-upcard #tutorial #bordkort #fotballkort #malpåkort #fotball #stepcard #stepcardtutorial #stepcardtemplate #velkommentilkonfirmasjon #vinnere


Related Posts Plugin for WordPress, Blogger...