This is a tutorial written for the magazine - Ett trykk, February 2016
My first item in print, was a little paper dress, created from coffee filters, in a heart box. The box was based on a the shape for many similar boxes found online. I really like this shape, and like the way the box opens at the top, just by squeezing it.
Heart box tutorial
Materials:
Paper: Maja design, Summer time - Smell the roses. White bazzill og acetate.
Ink: Archival Inkpad - Jet Black, Tim Holtz: Vintage Photo - Distress Ink Pad
Template:
Tutorial:
Cut out the pieces according to the template. Score along the dashed lines.
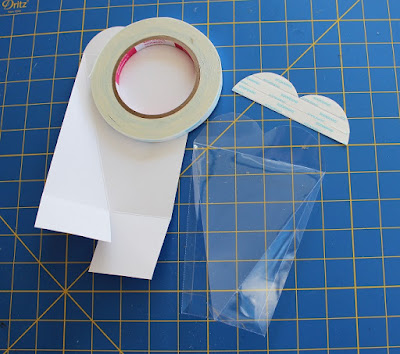
If you want a transparent front, use acetate for the front piece. Also cut an extra piece of the heart top in Bazzill.
Fold along the scored lines. There are only a few types of glues that will stick to acetate. Use a good double sided tape like score tape. Mount the little top of the heart, to the front of the acetate, at the front of the box.
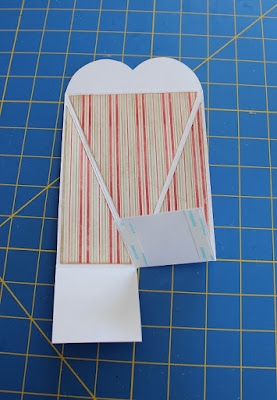
Mount panels to the inside of the box. It is important that you decorate the box inside, before you mount it together. This decoration is difficult to do, after you have mounted the box together.
Glue under one of the squares at the bottom, and glue that square over the other. This is creating the bottom of the box.
The bottom of the box has been mounted together. The inside of the box has been decorated.
Mount Score tape on all the acetate glue tags.
Mount the acetate tags, under the box. Then, mount the acetate tags at the side of the box, at the back - outside the box. It could be a good idea, to keep the back strips of the Score tape on, until you are going to glue ut.
The box itself, has been created. Add the panels in patterned paper to the back, and under the box. a piece of patterned panel paper to the front - top heart.
The box is now finished with panels, and can be decorated.
The front of the box, has been simply decorated with a home made flower, a small text and leaves.
The back of the box has been simply decorated with a stamped text, roses from Wild Orchid
and Mathia flowers.


Nydelig! :) Takk for tutorial. Gleder meg til å prøve. :)
SvarSlett